Configure KPI
After adding an asset or component, you need to configure KPIs. Perform the following steps to configure KPIs:
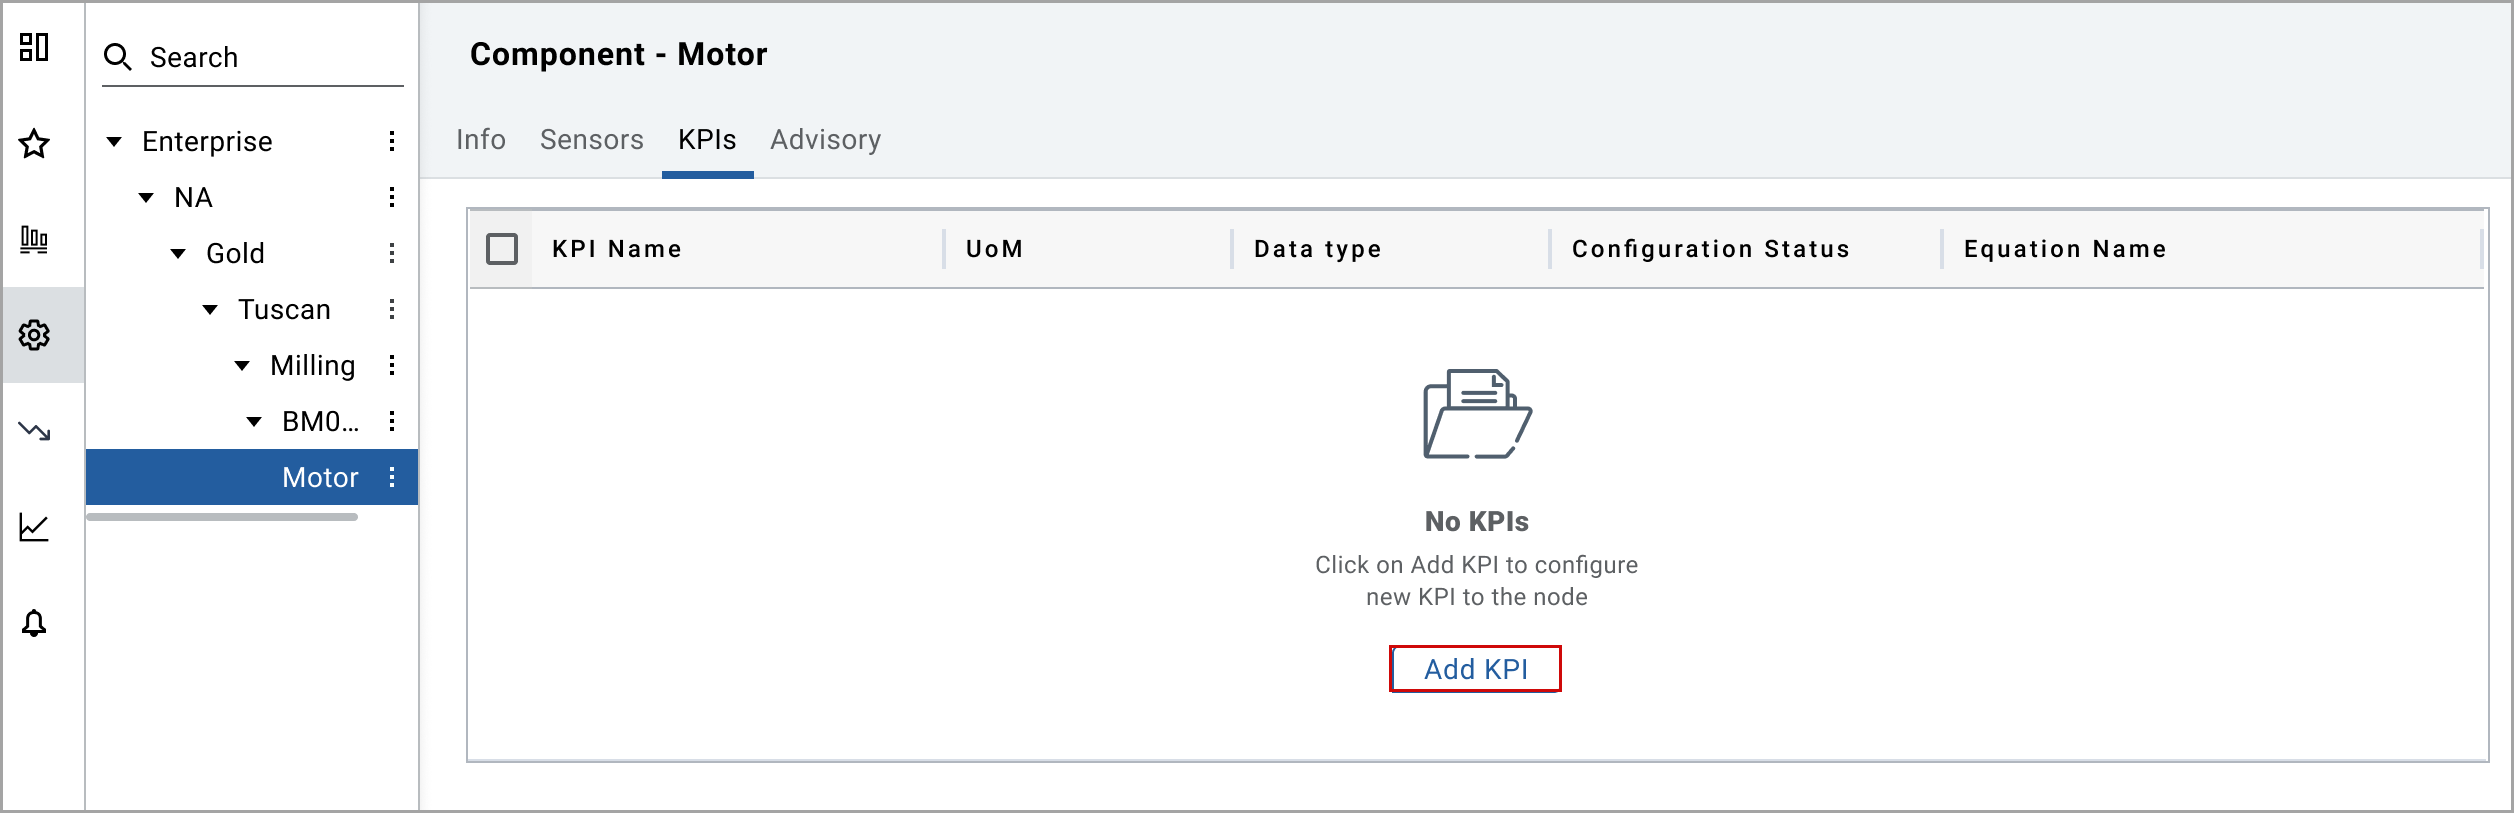
- After adding an asset or component, select theKPIstab.
- Click [Add KPI].Add KPI
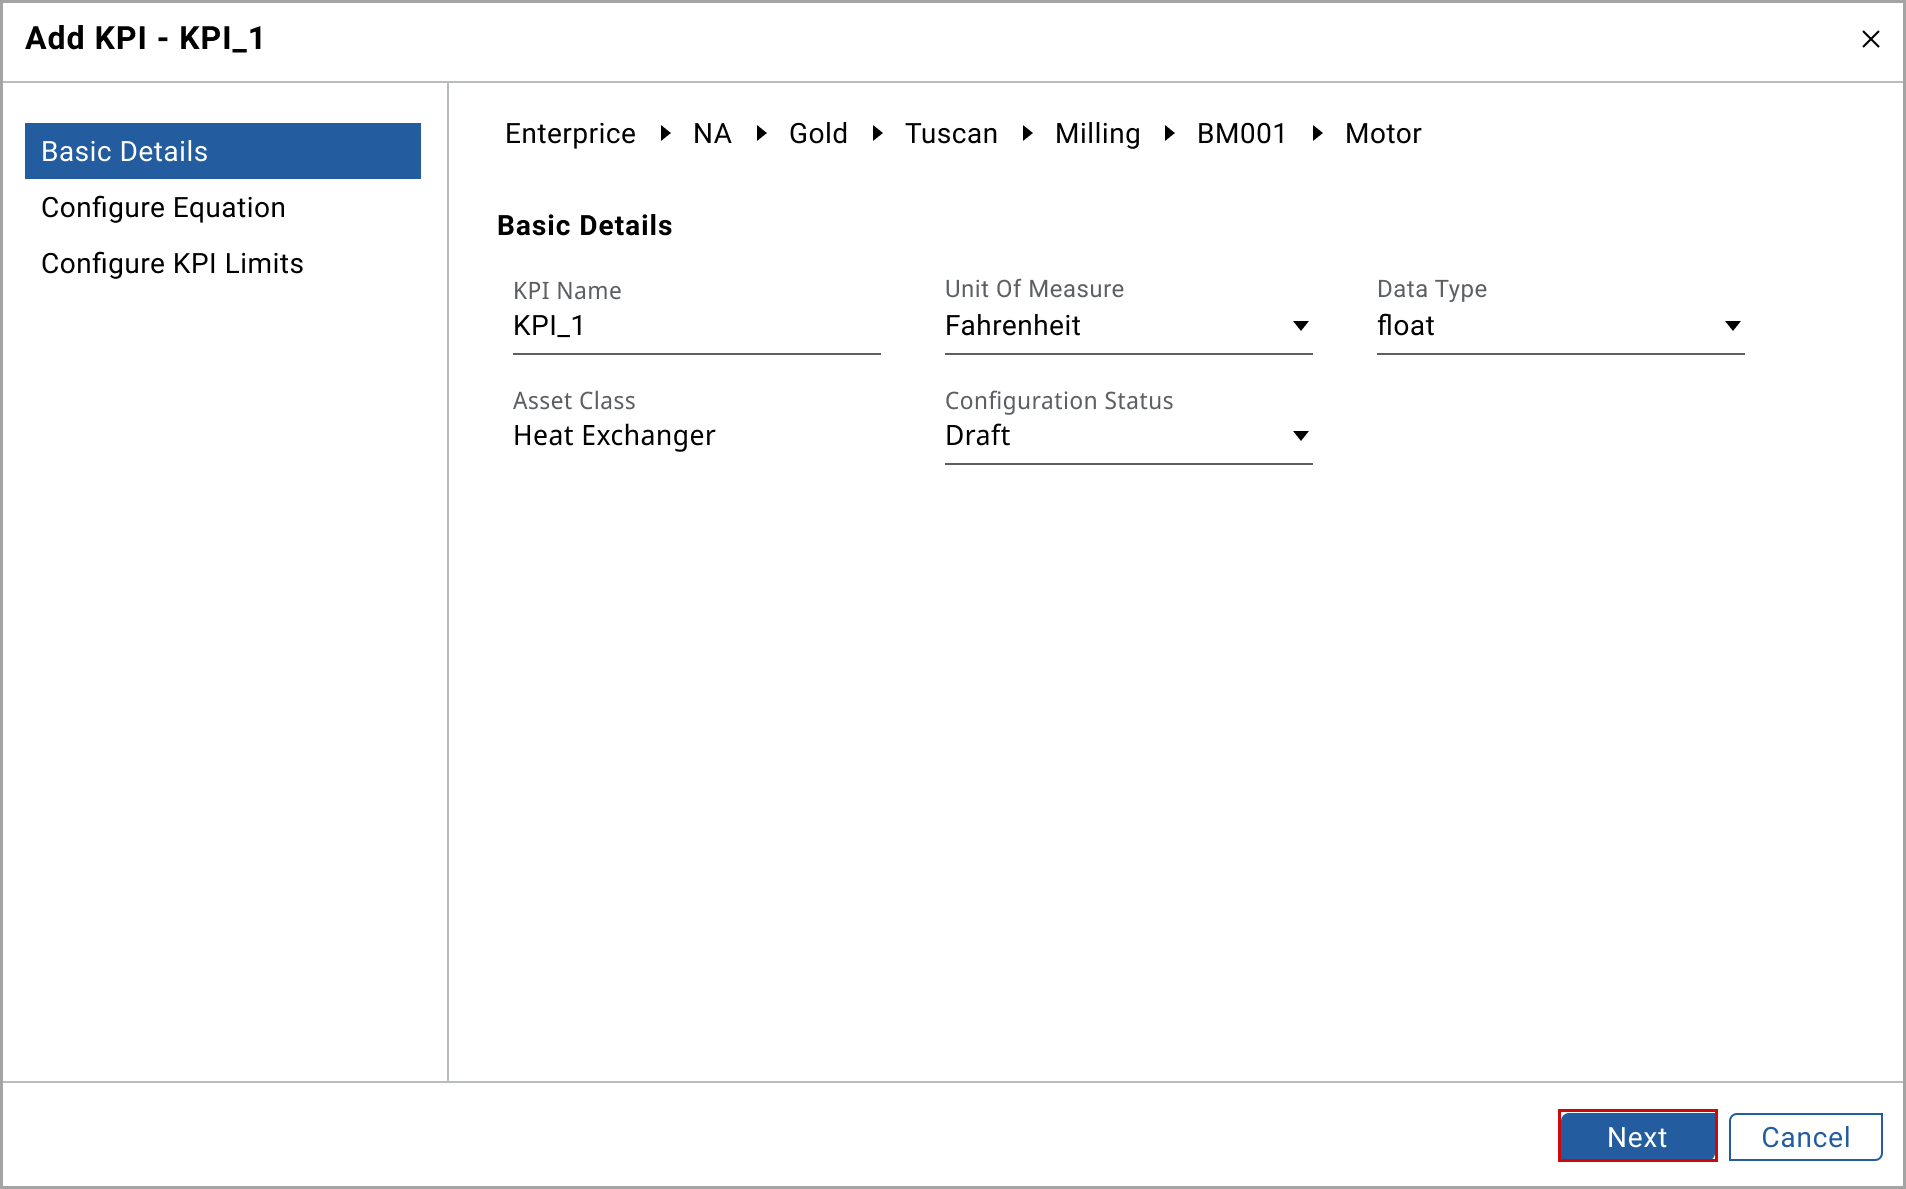
- In theBasic Detailstab, set these parameters:
- Sensor Name: Provide the sensor name.
- Unit of Measure: Provide the unit of measure.
- Data type: Provide the data type.
- Asset Class: By default, it shows the asset class details.
- Configuration Status: Select the status from the drop-down list.
- Click [Next].Basic Details
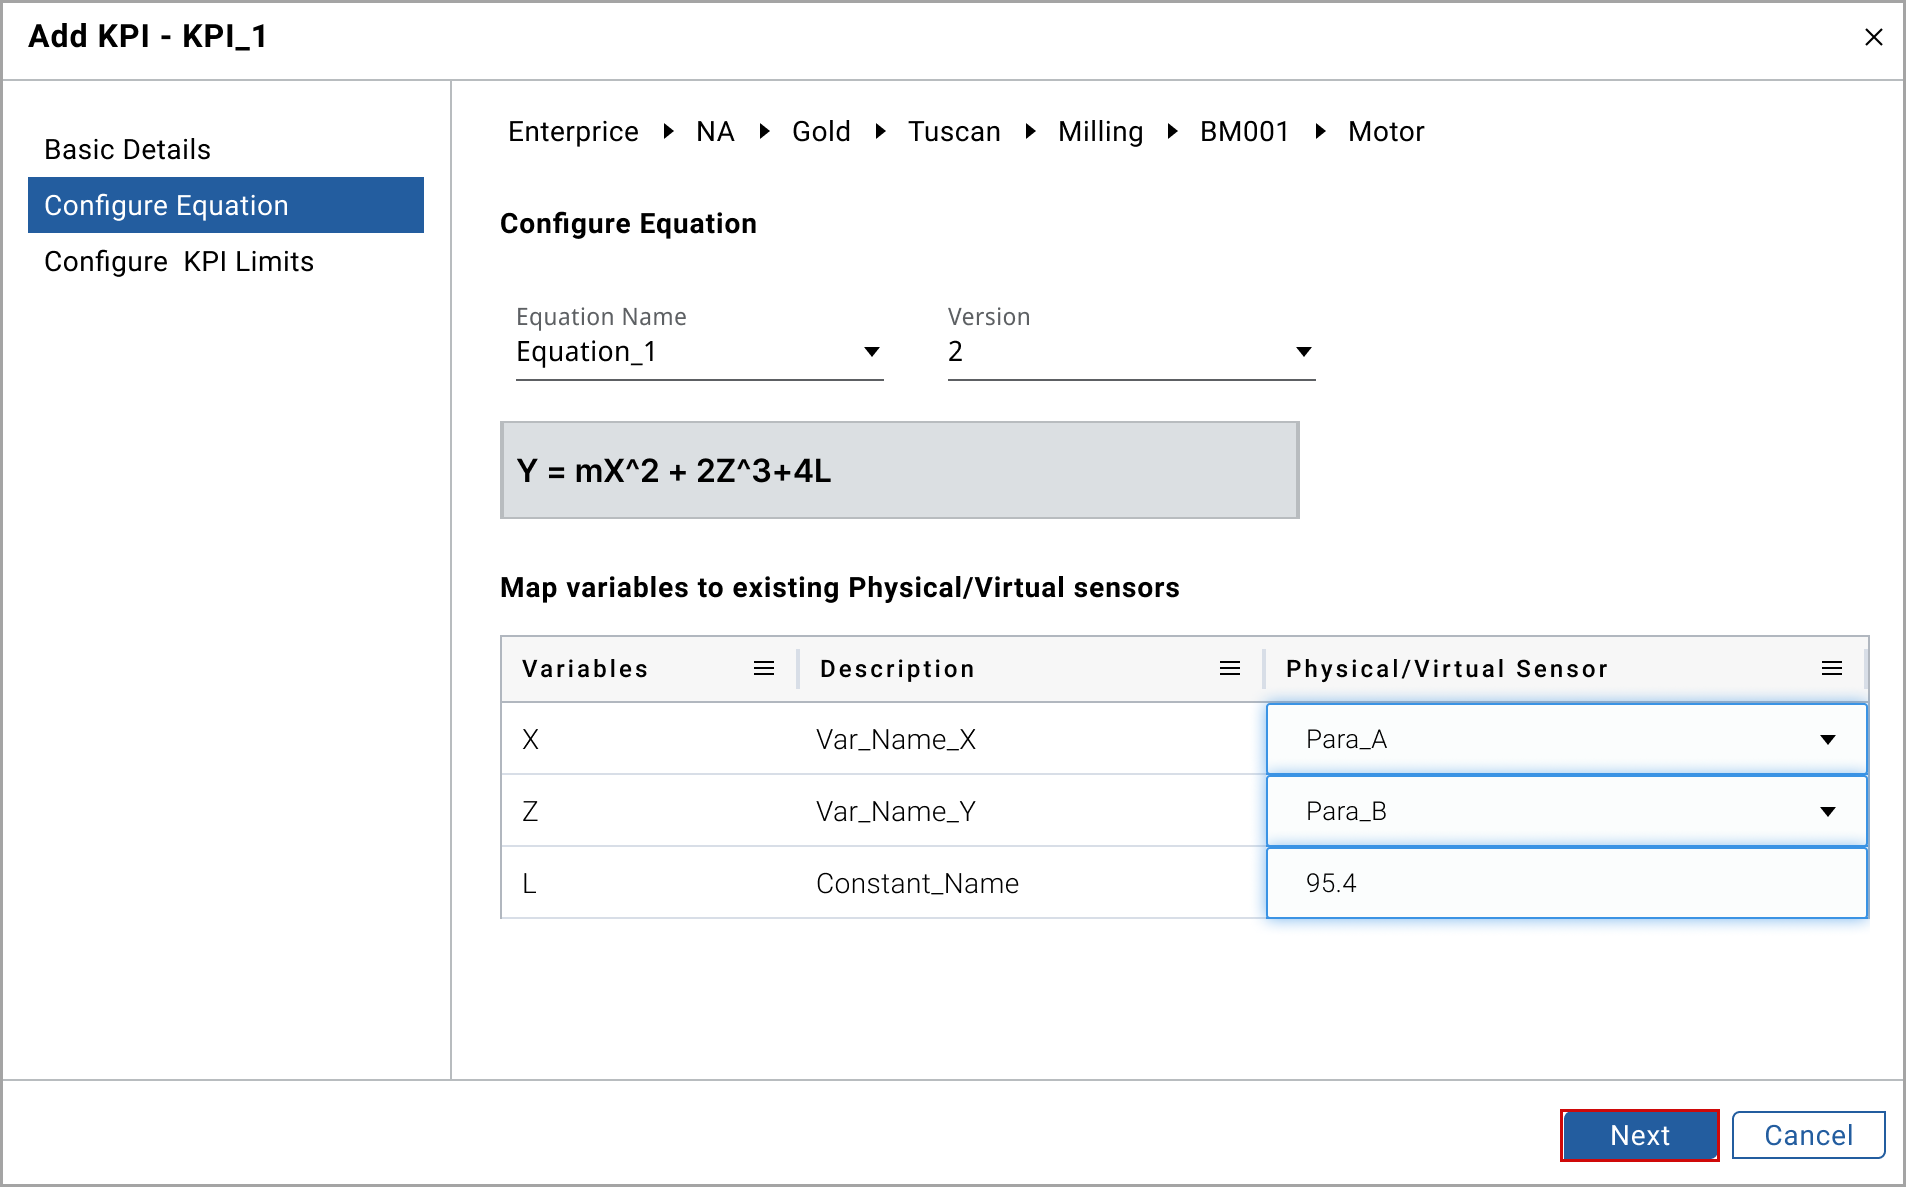
- In theConfigure Equationtab, perform the following actions:
- Equation Name: Select the equation name from the drop-down list.
- Version: Select the version from the drop-down list.
- Map the variables to the virtual sensors.
- Click [Next].Configure Equation
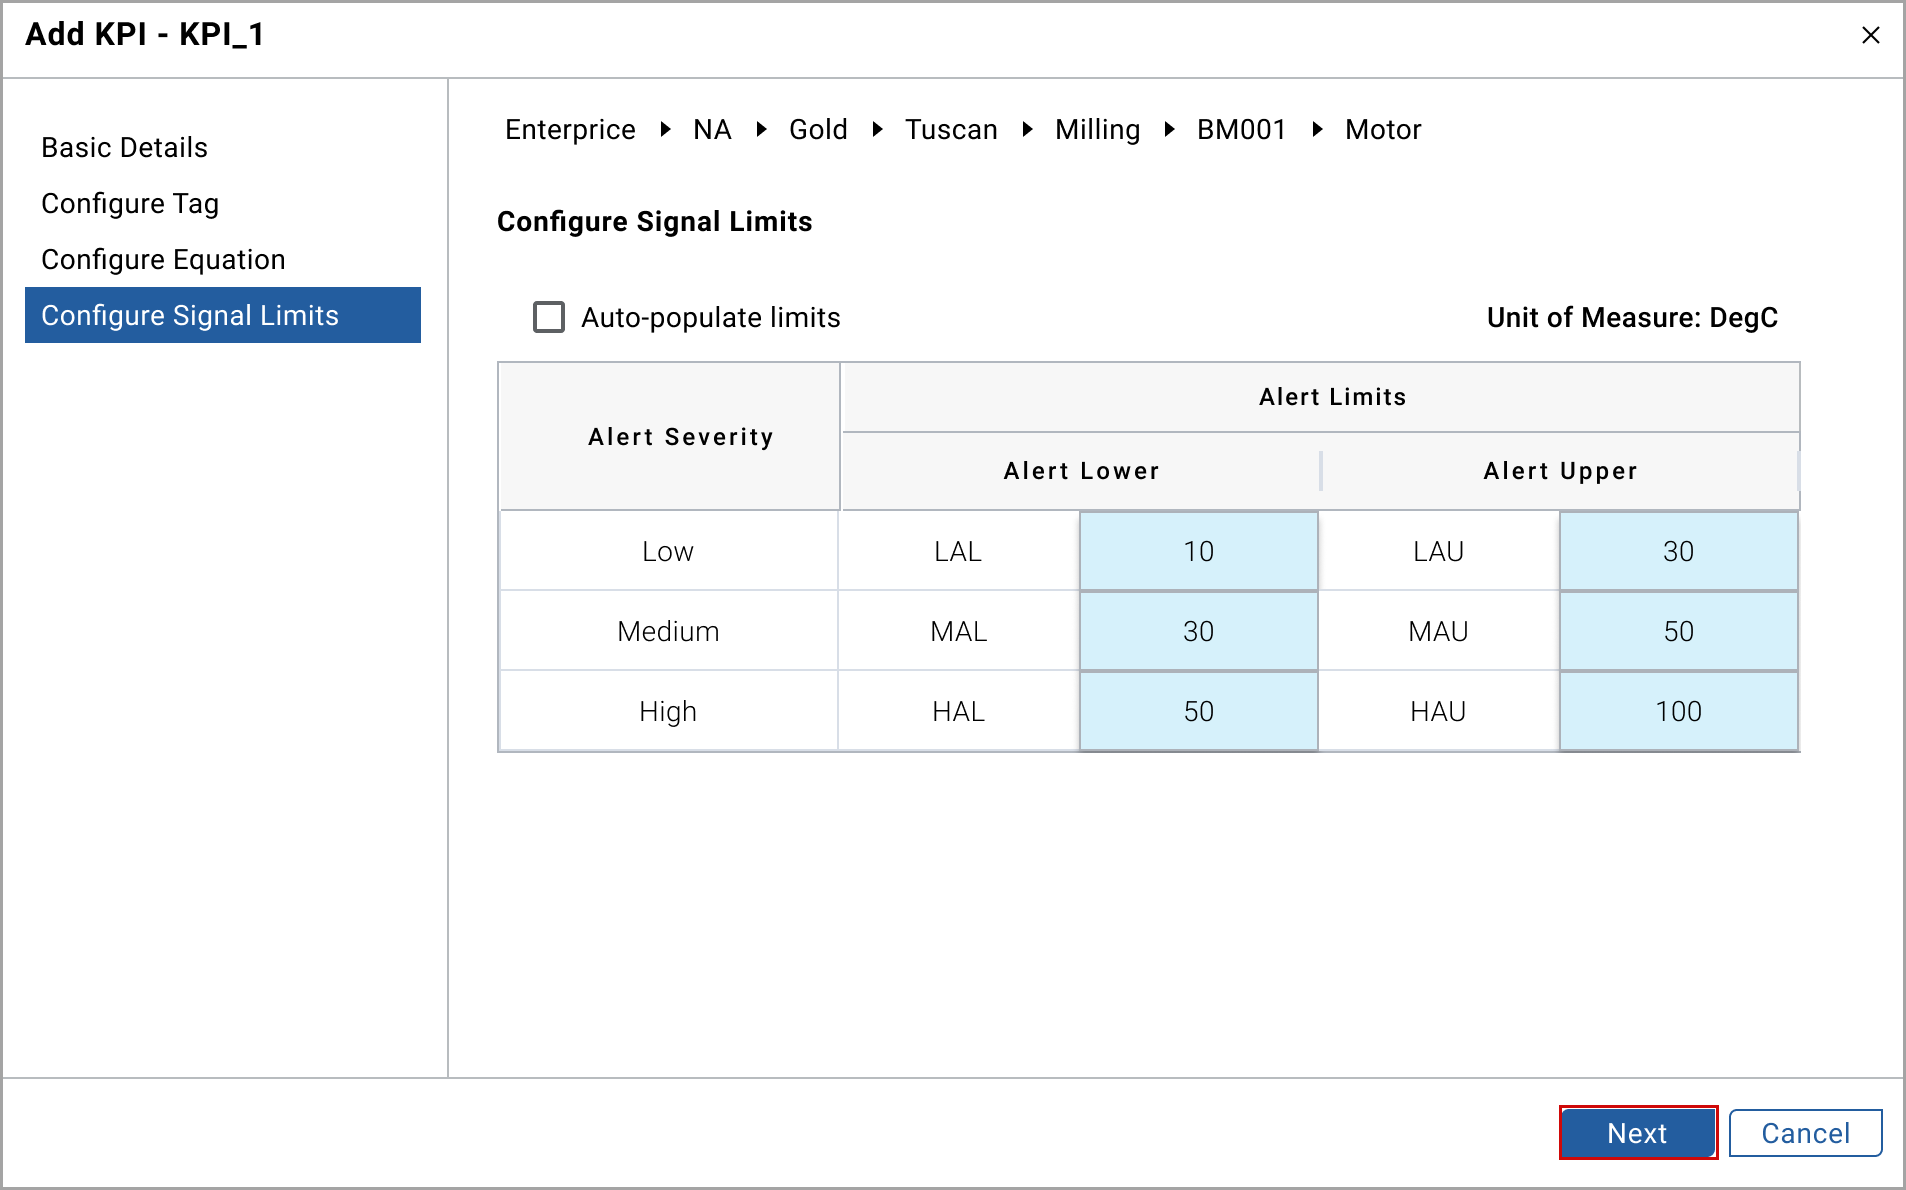
- In theConfigure KPI Limitstab, provide the values in theAlert LowerandAlert Upper.NOTE: Click theAuto-populate limitscheck box to add system-generated limits.
- Click [Add].Configure KPI Limits
 The KPI is added to the KPIs table and the "KPI was added under the asset successfully" message displays.
Perform the following steps to edit the KPI details:
- Select the required KPI check box from the KPI table.
- Click [Edit] and edit the required fields.
- Click [Save].
Perform the following steps to delete the KPI details:
- Select the required KPI check box from the KPI table.
- Click [Delete].
Provide Feedback