FactoryTalk Alarms & Events
For compatibility, it is recommended to use the following versions of software to work with DataView 4.01.00:
- FT Metrics Version 13.00.00
- FT Alarms & Events Version 6.21.00
Perform the following steps to configure the FactoryTalk Alarms & Events Connection:
- Click the Connection tab.
- Click [Add Connection].
- Select the FactoryTalk Alarms & Events connection from the Connections List.Create Connection

- Define the following details:
- Connection Name:Provide the Connection name.
- Host Name (IP Address):Host system for the database instance.IMPORTANT:For the sections, FQDN-hostname, if the database is installed on the same machine where the platform is installed, then localhost can be used.
- Ports:This is the listener port for the database. The port number varies based on database type (e.g. 1433 for Alarms & Events).
- DB Name:Provide Database name.
- User Name:User Name created by database Admin User.IMPORTANT:User Name is case sensitive.
- Password:Password created by database Admin User.
- Folder Name:Select the folder name to save the Connection in the folder.Test Connection - Disabled Windows Auth

- Enable Windows AuthenticationNOTE:If the User enables theWindows Authcheck-box, the User Name and Password are not required.
- Connection Name:Provide the Connection name.
- Host Name (IP Address):Provide the host system IP Address for the database instance.IMPORTANT:For the sections, FQDN-hostname, if the database is installed on the same machine where the platform is installed, then localhost can be used.
- Ports:This is the listener port for the database. The port number varies based on database type (e.g. 1433 for Alarms & Events).
- DB Name:Provide Database name.
- User Name:Not Required.
- Password:Not Required.
- Folder Name:Select the folder name to save the Connection in the folder.Test Connection - Enable Windows Auth
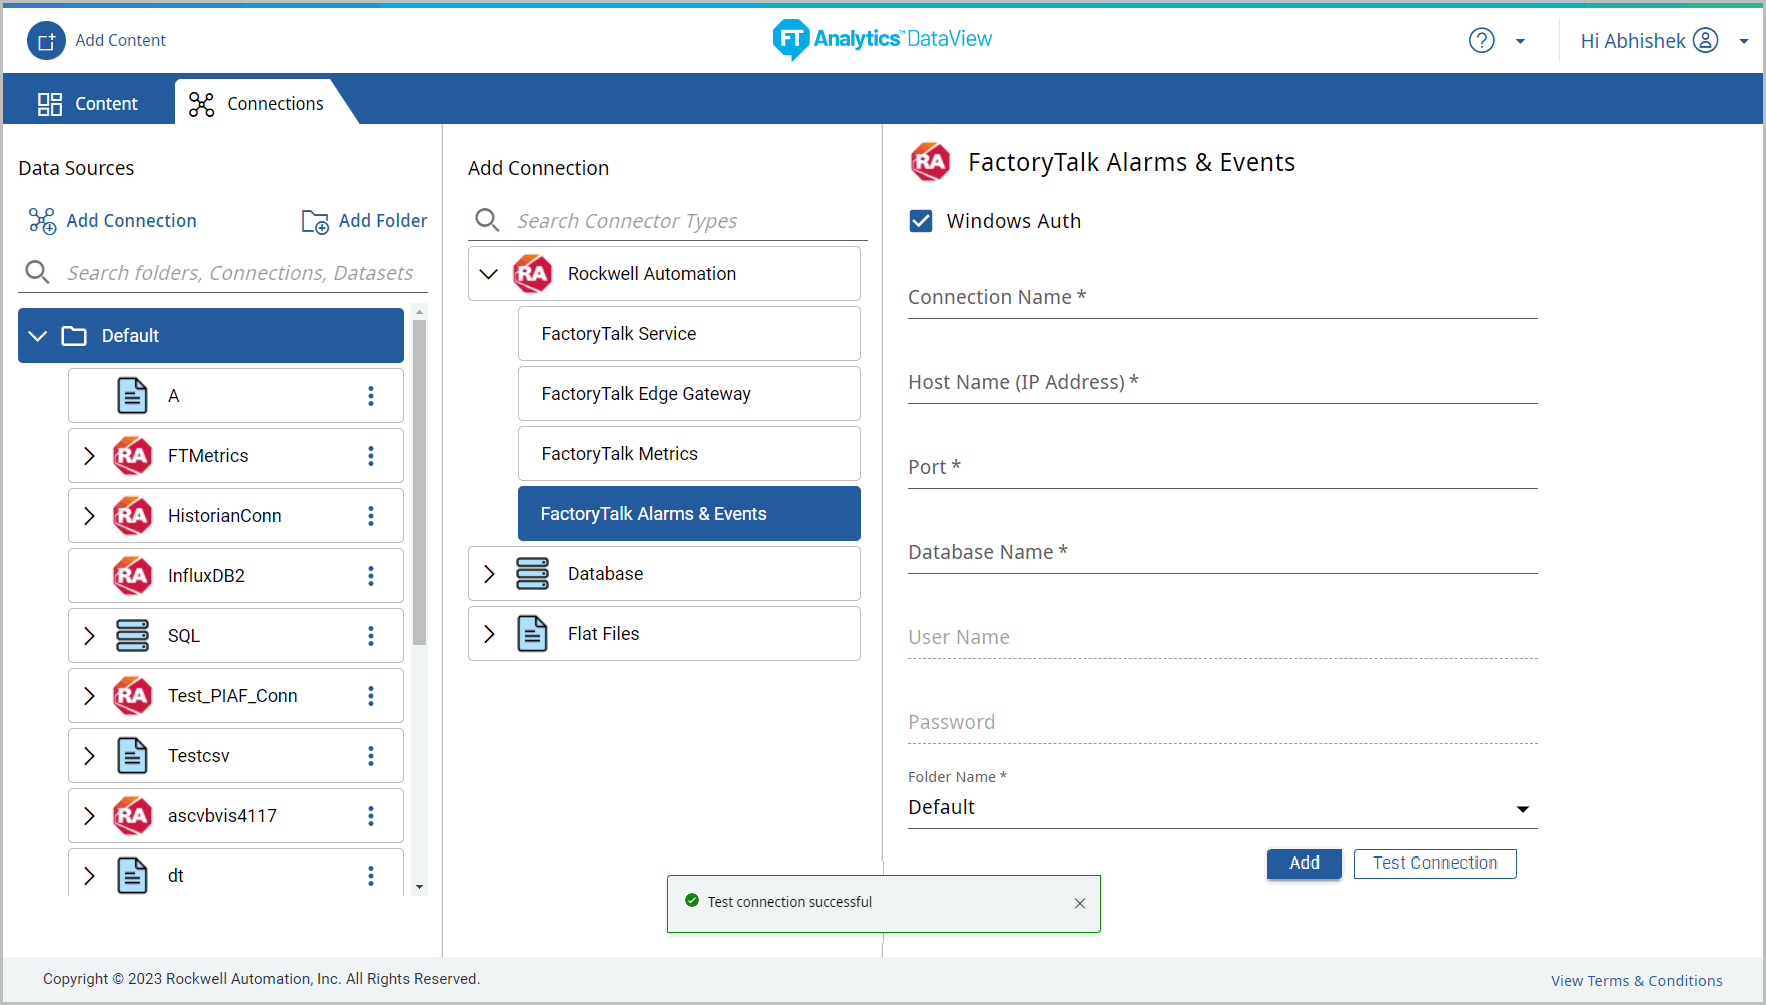
- Click [Test Connection]. The “Test connection successful” message displays.
- Click [Add] to create a connection. The “Connection saved successful” message displays. The created connection will be saved in the folder.
Provide Feedback