Alarms & Events Template
Perform the following steps to create a Storyboard with Alarms & Events template:
- Click [Add Content].
- Select the Content type as Storyboard.
- Select the Alarms & Events template from the list.NOTE:Ensure that the FactoryTalk Alarms & Events Connection is already created.
- Navigate to the desired folder where the connection is saved.NOTE: User can click [Add Connection] to create new connection.
- Select the FactoryTalk Alarms & Events Connection from the folder.
- Click [Add Content].IMPORTANT:User can click [Back] to navigate to previous page.
 Create Storyboard
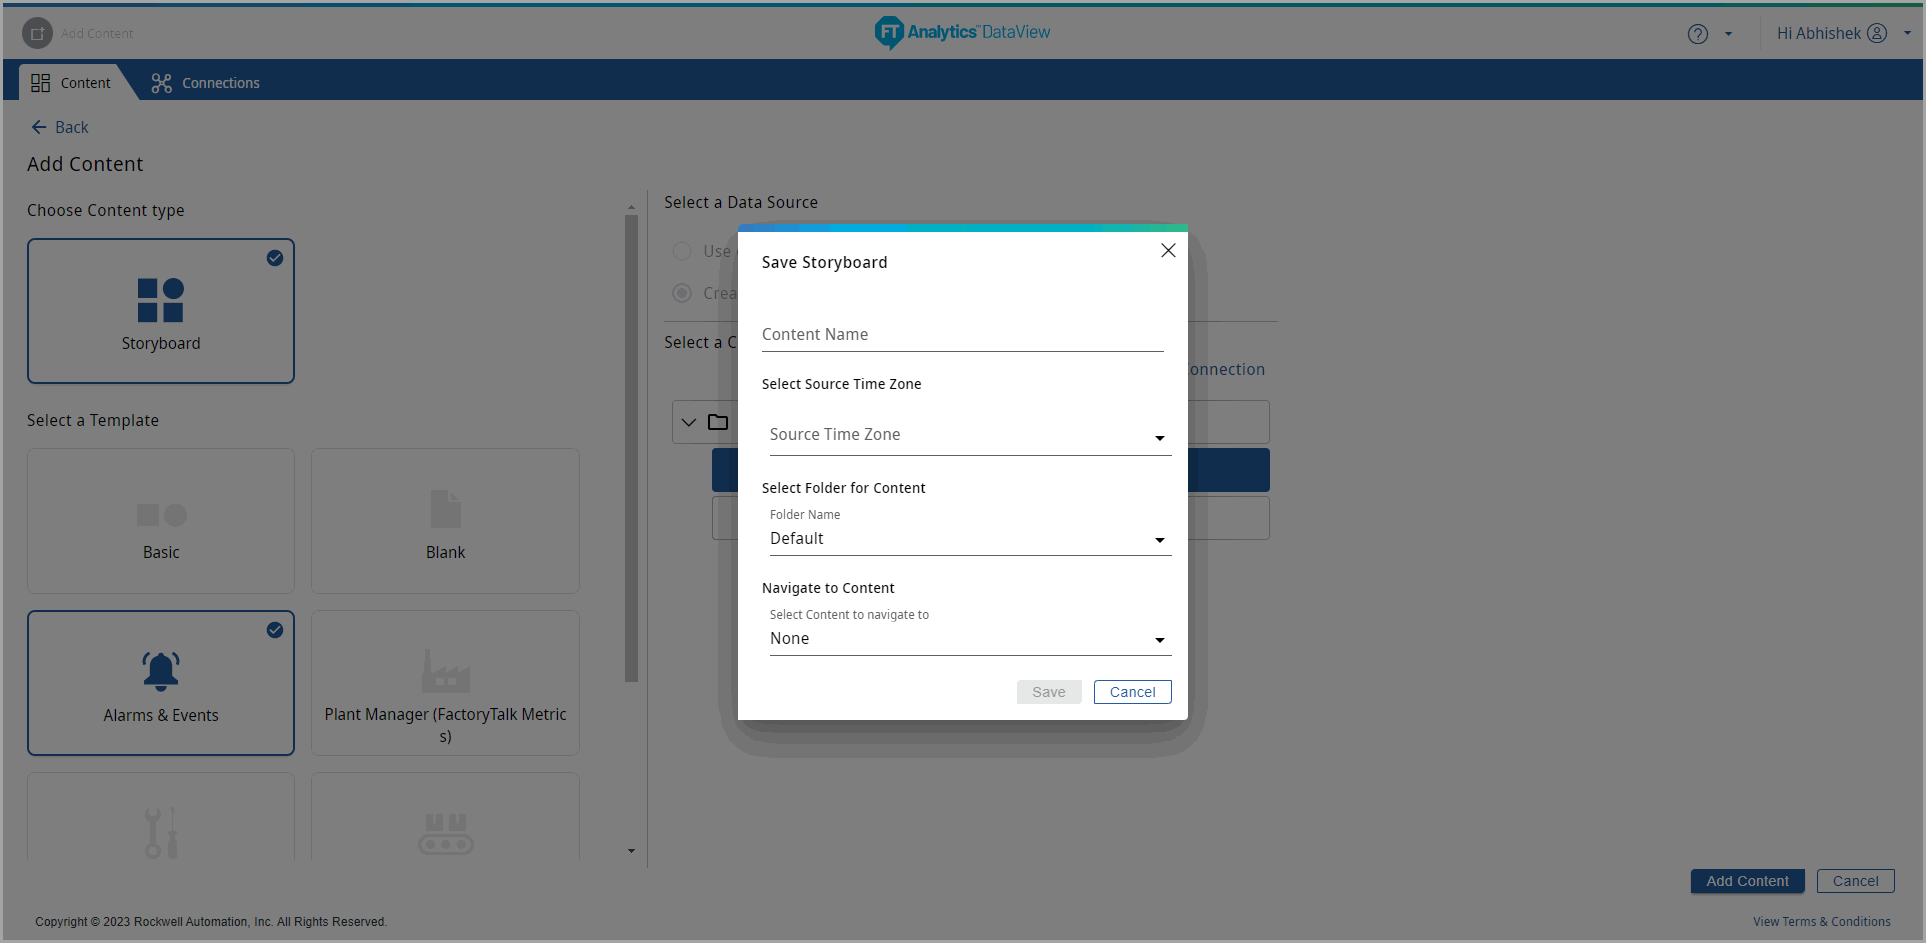
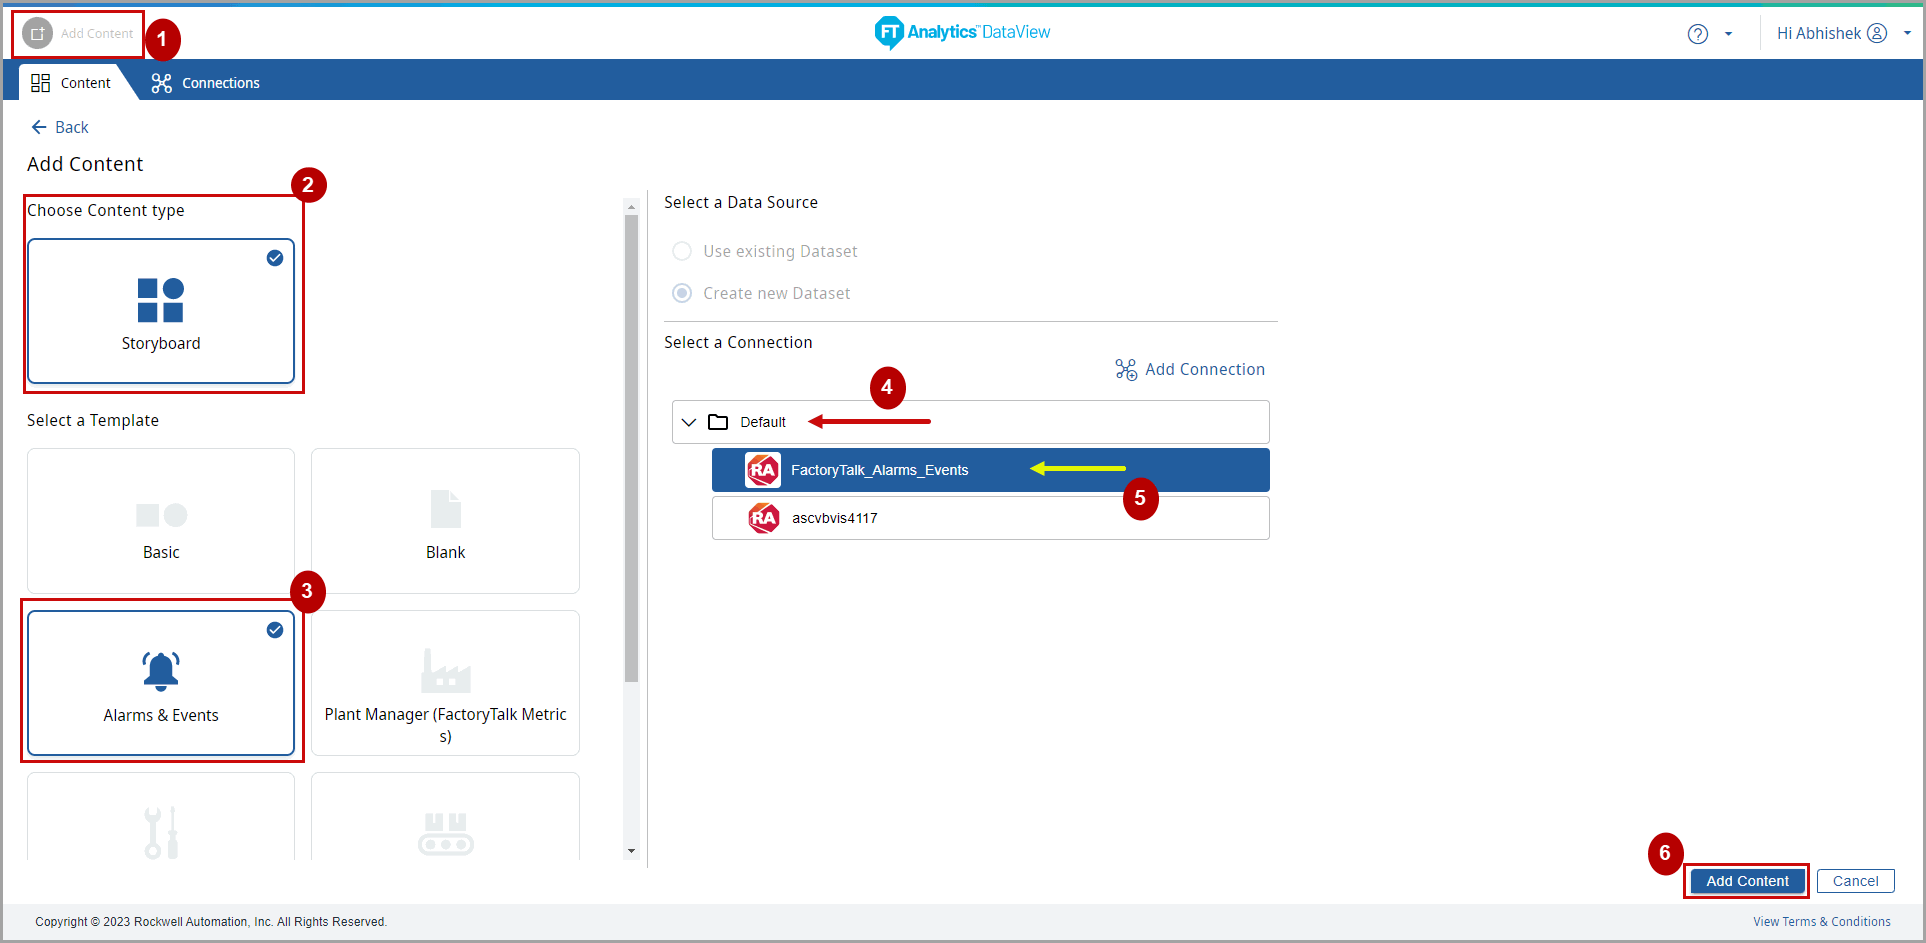 The Save Storyboard dialog displays.
 - Provide the following details to enable the Save option:
- Content Name:Provide the Storyboard Name.
- Select Source Time Zone:Select the Source Time Zone from the drop-down list.
- Select Folder for Content:Select the folder for Storyboard to be saved.
- Navigate to Content:Select the Content that the User will be able to navigate to. This will cause an association from the current Storyboard to the selected Content. Click the arrows in the bottom right corner to navigate to the linked Content.
- Click [Save].Save Storyboard
 The Storyboard created successfully message displays.Storyboard Created
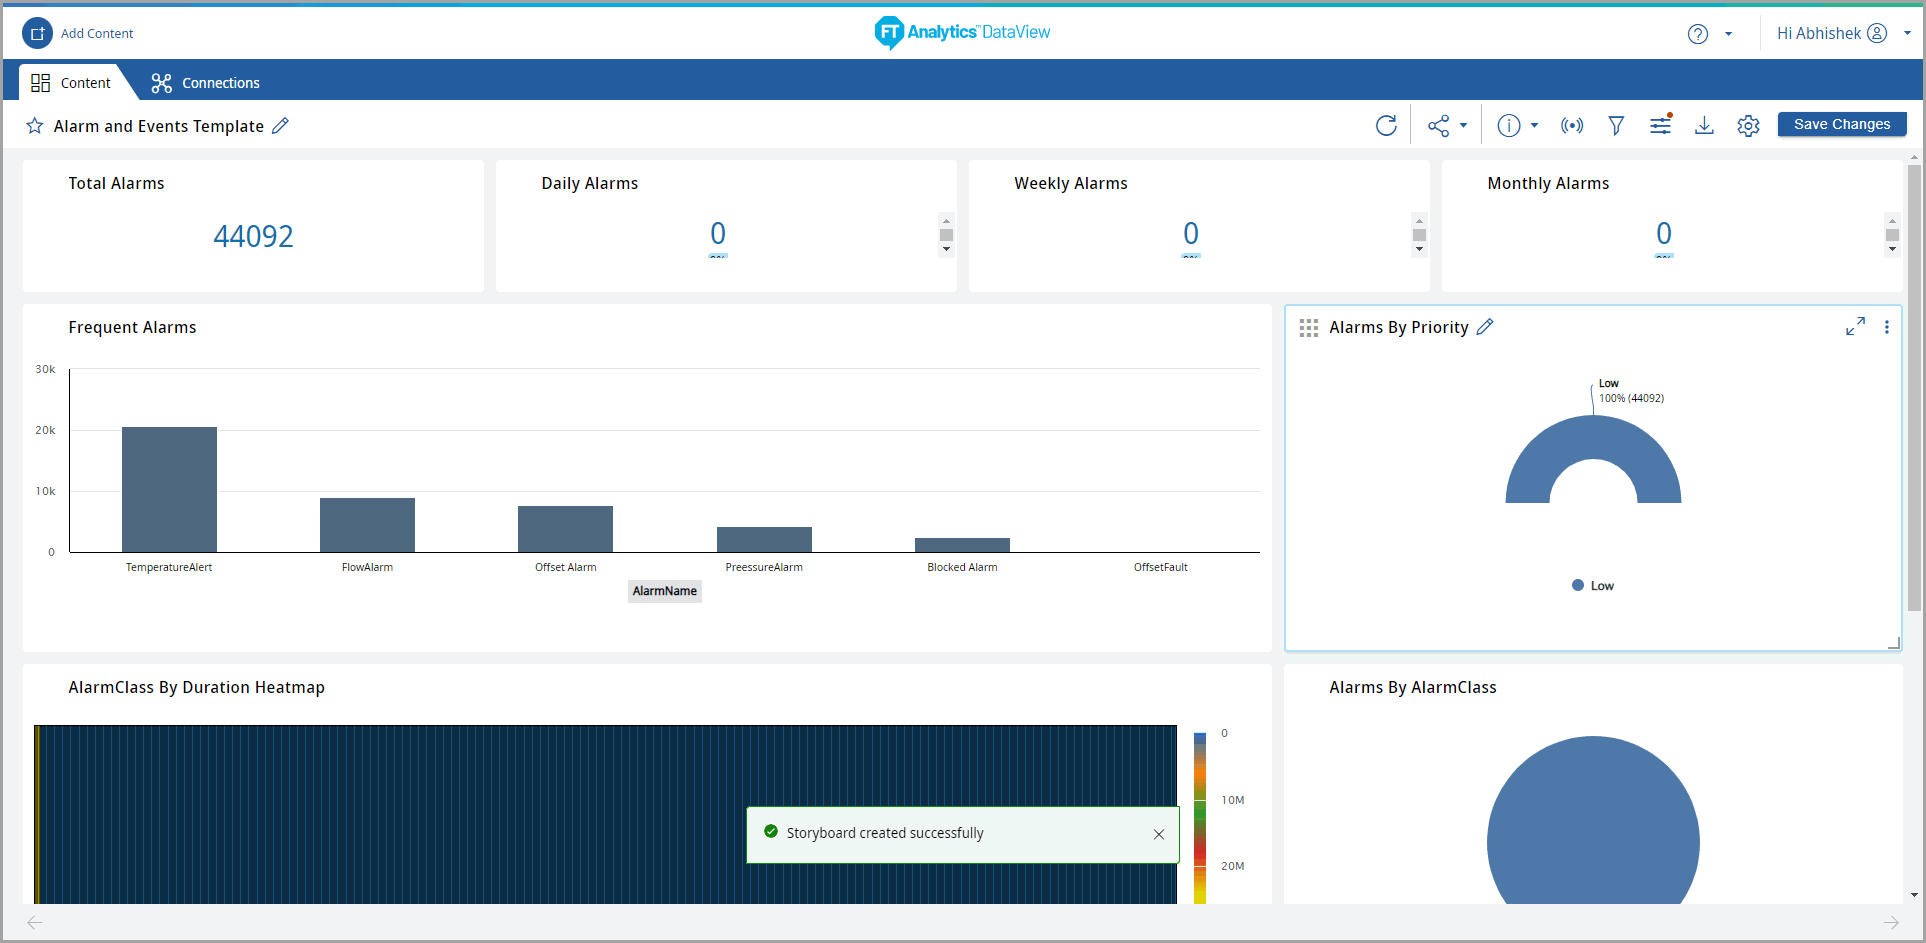
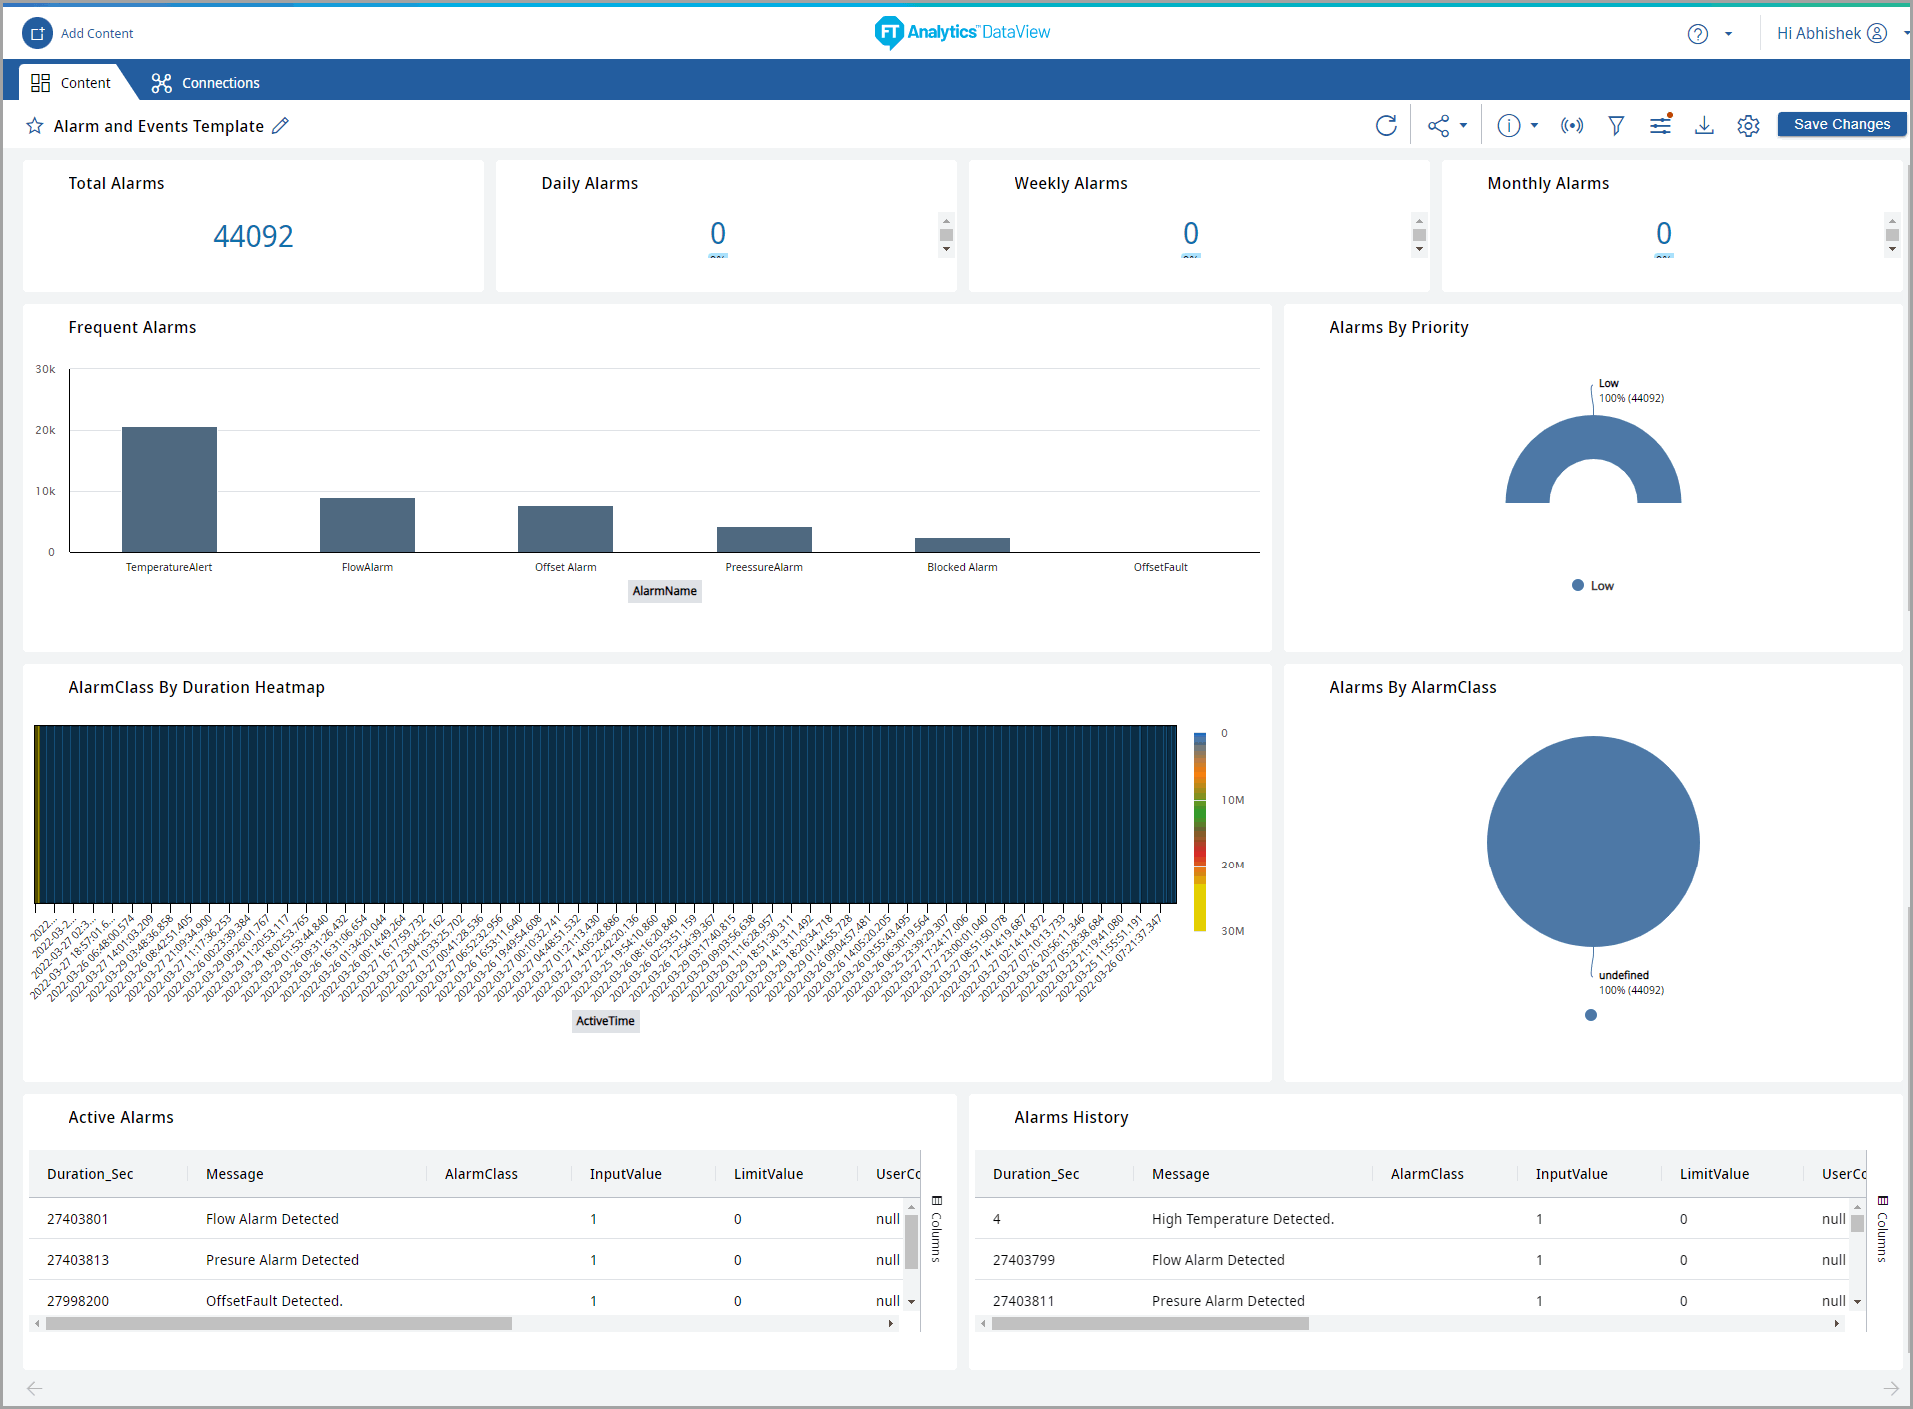
- Use the vertical scroll bar to view the different charts in the Storyboard and horizontal scroll bar to view other columns in the data table including the Priority Label column.Storyboard - All Chart Tiles
 The saved Storyboard displays in the Storyboards section on the home page.Alarms & Events Template Storyboard
Provide Feedback