Accessing FTDirectory on the Network
Rockwell’s FactoryTalk Services library uses the “Rockwell Directory Multiplexer” and other FactoryTalk services to access the (possibly remote) underlying directory service and other services. In order to tighten security, the ACL for this service has by default been limited to the following Users and Groups:
- Local System
- Administrators
- aspnet
- IIS_USRS
- Network Service
- Local Service
- Interactive
In order to allow the InfoPlatform service to access the FTDirectory on the network when running as a User account (non-administrative), the following configuration steps may need to be performed:
- Configure your registry to allow local activation permissions for the FTSecurity COM Server.
- Using DCOMCNFG, add the Service User to Launch and Activation Permissions configuration of the “Rockwell Directory Multiplexer”, “Rockwell Event Multiplexer”, “FTSysDiag Service Host runtime” COM Objects.NOTE:Rockwell Directory Multiplexer Service must be restarted or restart the OS if this step has been performed.
- Ensure the user account running the InfoPlatform service is present in the FTDirectory.
The following sections provide more detail for the steps required. Refer to the following link for additional details:
Repeat the instructions described below for each of the COM objects listed below.
IMPORTANT:
Take a note of the CLSID and AppID for each object and be sure to use these values when following the steps described.
Rockwell Directory Multiplexer:
CLSID 63EE418A-8337-11D3-AC57-00108302639F
AppID: 63EE417C-8337-11D3-AC57-00108302639F
Rockwell Event Multiplexer
CLSID: C9C387E3-9174-49D0-8C2E-2C9E800568AB
AppID: F2196312-4EA0-11D3-989F-00104B701D4C
FTSysDiag Service Host runtime
CLSID: 8DE3560C-44F0-42EF-BCF2-D1C8C7781881
AppID: BFCEA316-21D7-45F0-96BD-8016F51715E9
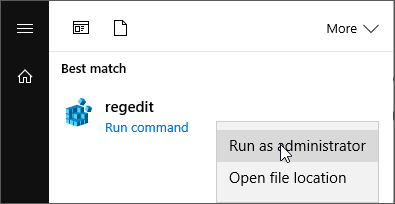
- Open Registry Editor as an Administrator.Click start menu, type regedit, right-click on [regedit] and click [Run as administrator].Registry Editor
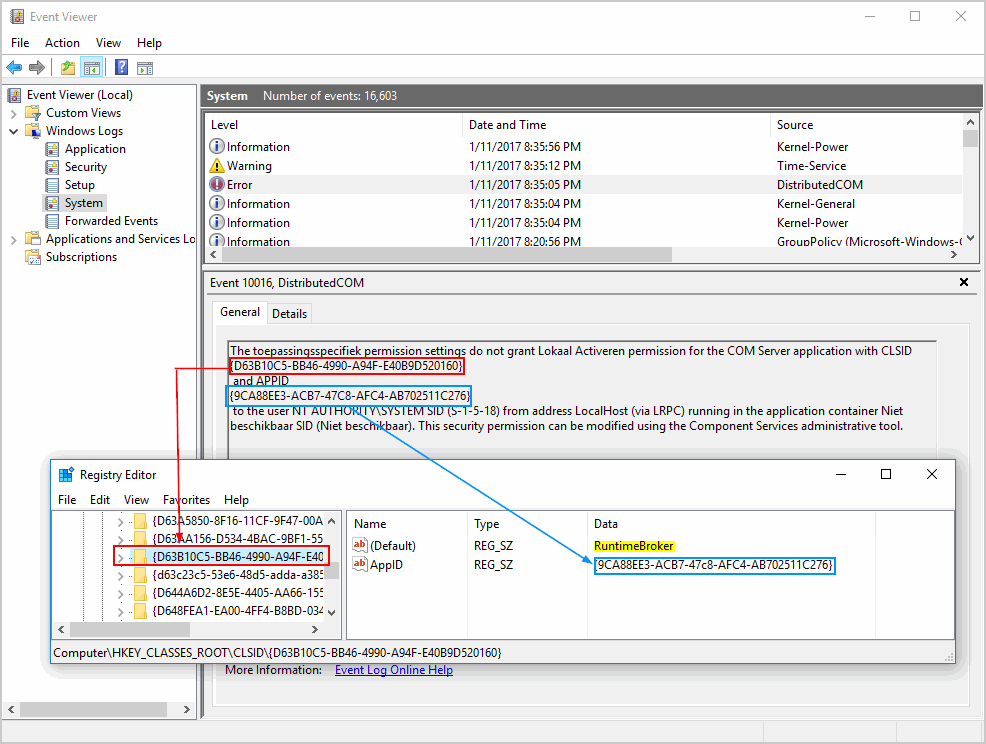
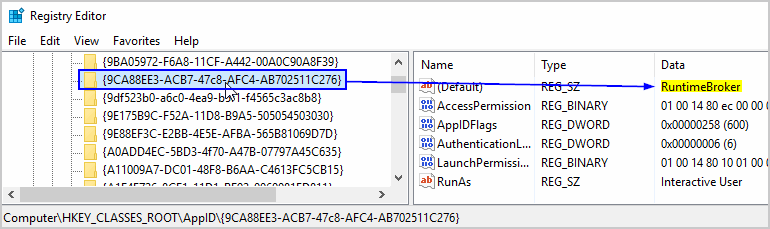
- Step 2 Navigate toHKEY_CLASSES_ROOT\CLSID\{D63B10C5-BB46-4990-A94F-E40B9D520160} (again, if CLSID is different, choose desired CLSID).To verify the right location, please refer the CLSID, and the values within that key. If right, also see the APPID as a value. Note the Application Name.Write down the Application Name.CLSID
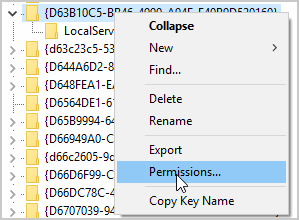
- Right-click the key {D63B10C5-BB46-4990-A94F-E40B9D520160} and click [Permissions].Key Permissions
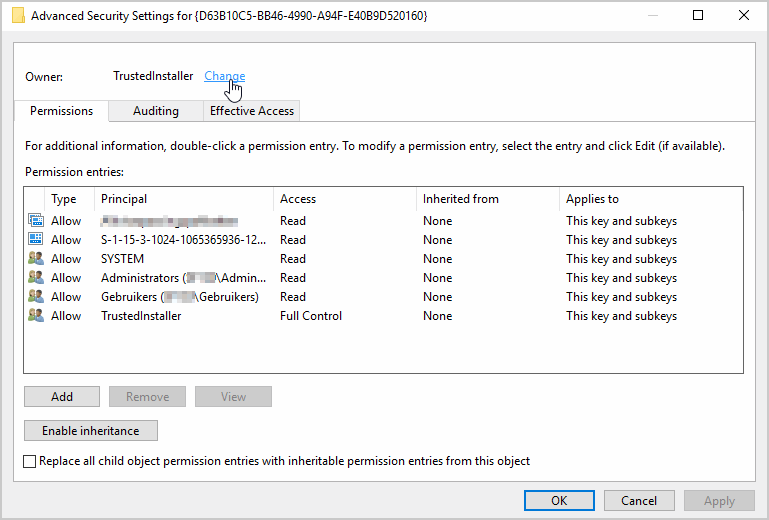
- In the Permissions window, choose [Advanced].Permissions - Advanced
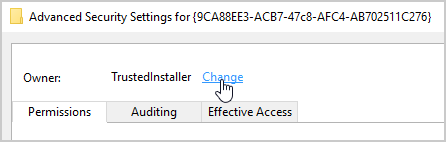
- In the Advance Security Settings window, click [Change].Owner
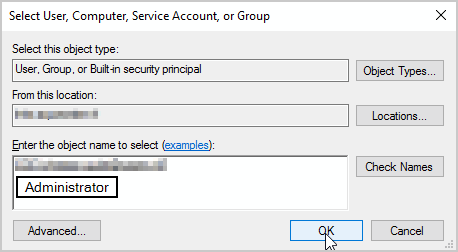
- Type your administrator account. Click [Check Names] to verify. If user don’t know the name exactly, can use the [Advanced] button to search for all accounts and choose the Administrator account by double clicking. Click [OK] to confirm.Select User
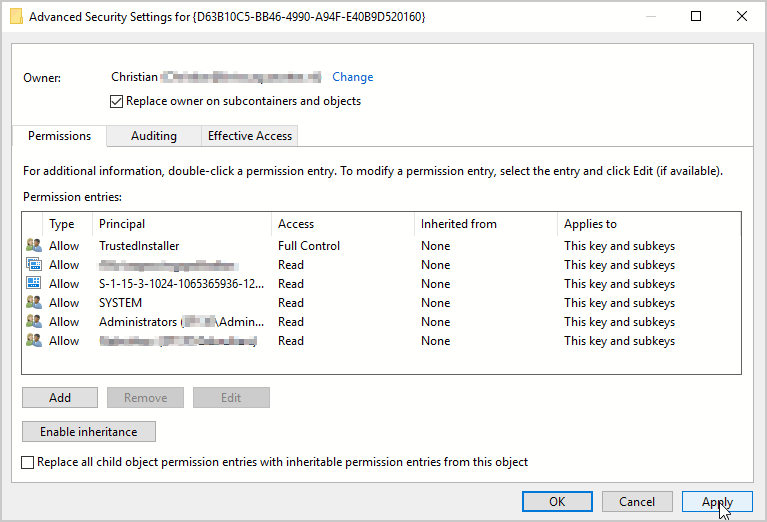
- Back in the Advance Security Settings window, click [OK] to confirm. Notice at the top that the Owner has changed from TrustedInstaller to your administrator account.Apply Advance Security Settings

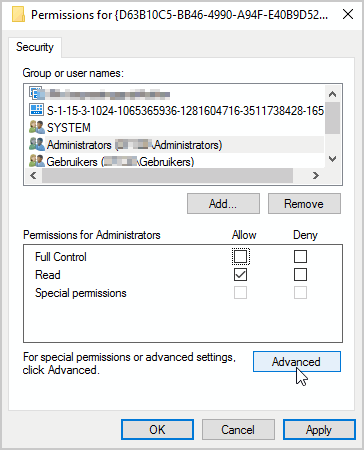
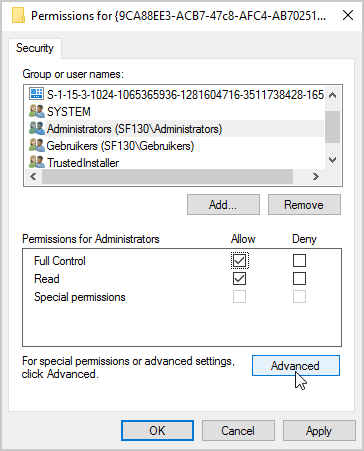
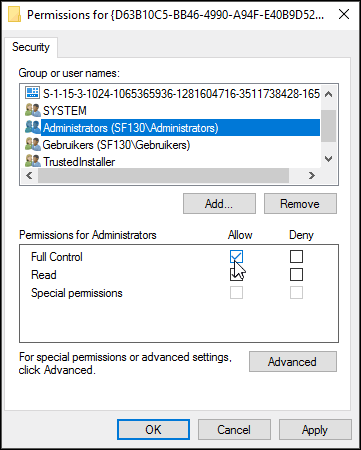
- Back in the “Permissions for {…}” window, select the [<Computername>\Administrators] and then activate the “Full control” checkbox. Click [OK] to confirm.Select the [SYSTEM] and then activate the “Full control” checkbox. Click [OK] to confirm.Activate Full Permissions

- Step 2 to 8 described the configuration for the CLSID {…}. Now, we also need to do the same to the APPID {…}.Navigate to HKEY_CLASSES_ROOT\AppID\{9CA88EE3-ACB7-47c8-AFC4-AB702511C276} (again, if the APPID is different to that shown here, choose desired APPID). User can verify the good location by checking the application name. This is the same application name as in Step 2.APPID
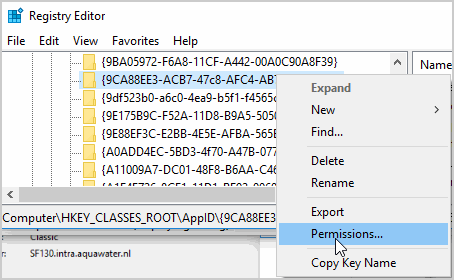
- Right-click the key {9CA88EE3-ACB7-47c8-AFC4-AB702511C276} and click [Permissions].Permissions
- In the Permissions window, choose [Advanced].Permissions - Advanced
- In the Advance Security Settings window, click [Change].Owner
- Type your administrator account. Click [Check Names] to verify. If user don’t know the name exactly, can use the [Advanced] button to search for all accounts and choose the Administrator account by double clicking. Click [OK] to confirm.Select User

- Back in the Advance Security Settings window, click [OK] to confirm. Notice at the top that the Owner has changed from TrustedInstaller to your administrator account.Apply Advance Security Settings
- Back in the “Properties for {…}” window, select the [<Computername>\Administrators] and then activate the “Full Permissions” checkbox. Click [OK] to confirm.Activate Full Permissions
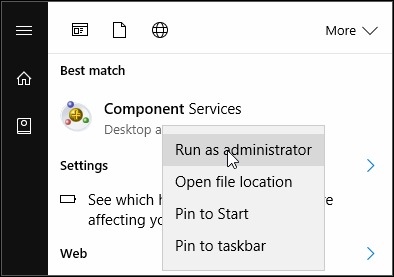
- Set all permissions to actually change the Local Activation settings. The following steps will solve the error.Click Start, type “Component Services“, right-click [Component Services] and click [Run as administrator].Component Services
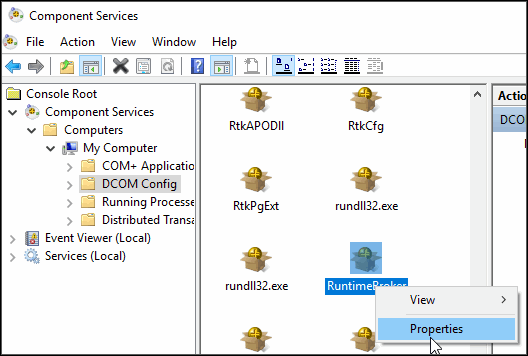
- Navigate to Component Services -> Computers -> My computer -> DCOM Config. Now, scroll down to the application user has issues with. If the instructions are followed, user has noted down the name at Step 2. For instance, it’s Runtime Broker. Right-click the application name and click [Properties].RuntimeBroker Properties
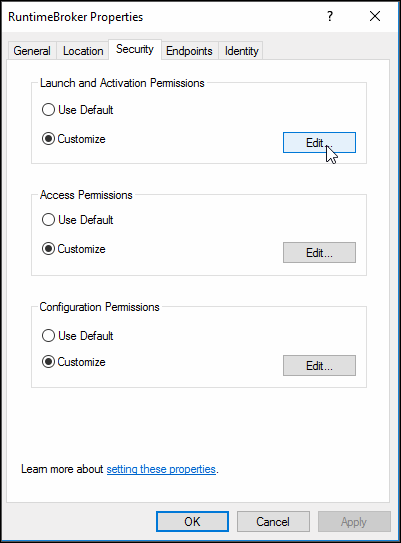
- Go to Security tab. Then, choose the appropriate action. If there are problems with Local Activation, choose “Launch and Activation Permissions” set to Customize, and then, click [Edit…] If there is an error related to “do not grant Access permissions”, choose “Access Permissions” -> Customize, and then click [Edit…]RuntimeBroker Properties - Security
- Click the name that the FTA InfoPlatform windows service is running as, and then click the appropriate permission. As shown in the screenshot below, the SYSTEM account is selected and I have set “Local Activation” to Allow.Launch and Activation Permission
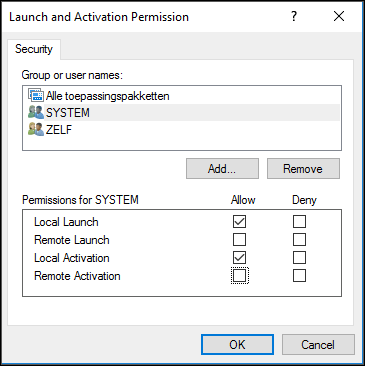 Add the Administrators (Computername\Administrators) account and then set “Local Activation” to Allow for Administrators. Click [OK] to confirm.
Provide Feedback