LDAP Integration with SSL
Perform the following steps to add LDAP to FTASecurity User Federation:
- Stop the FTASecurity Service.
- Go to theSCIOSecurity\standalone\configuration\standalone.xmldirectory, open thestandalone.xmlfile in an text editor.
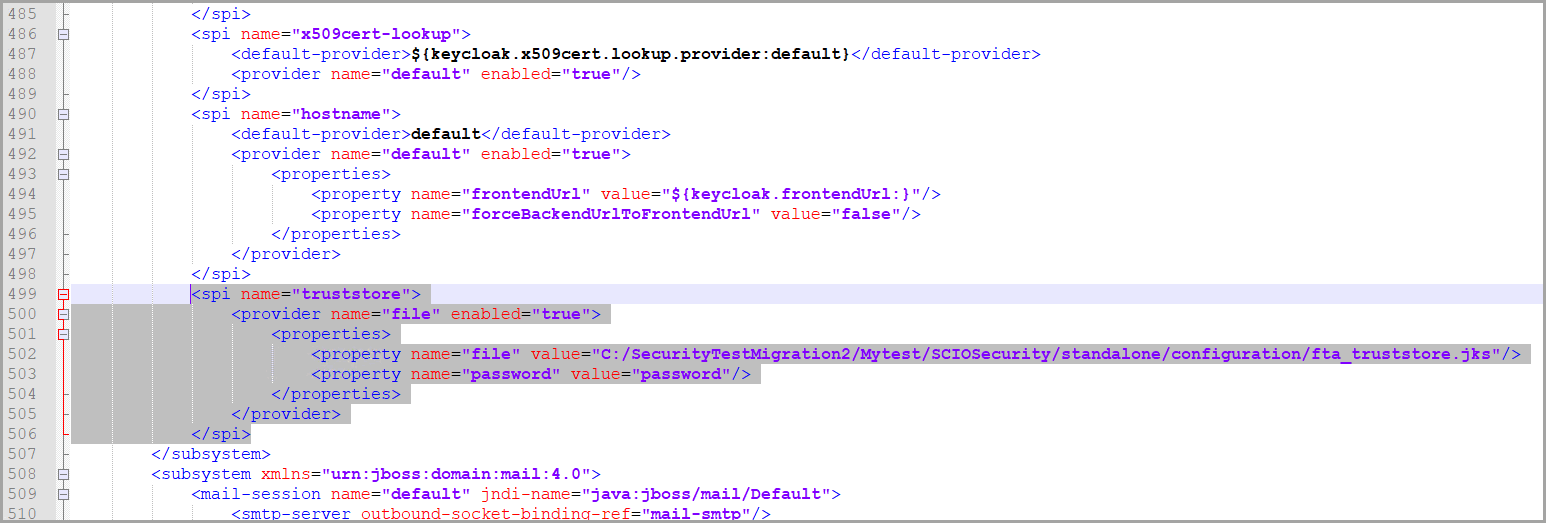
- Add the following SPI tag for truststore after the SPI “hostname” section<spi name="truststore"><provider name="file" enabled="true"><properties><property name="file" value="C:/SecurityTestMigration2/Mytest/SCIOSecurity/standalone/configuration/fta_truststore.jks"/><property name="password" value="password"/></properties></provider></spi>Refer the following image:Truststore SPI
- Start the FTASecurity service.
- Login to the client machine with the configured username and password.
- Login to the FTASecurity with given username and password to configure FTASecurity.
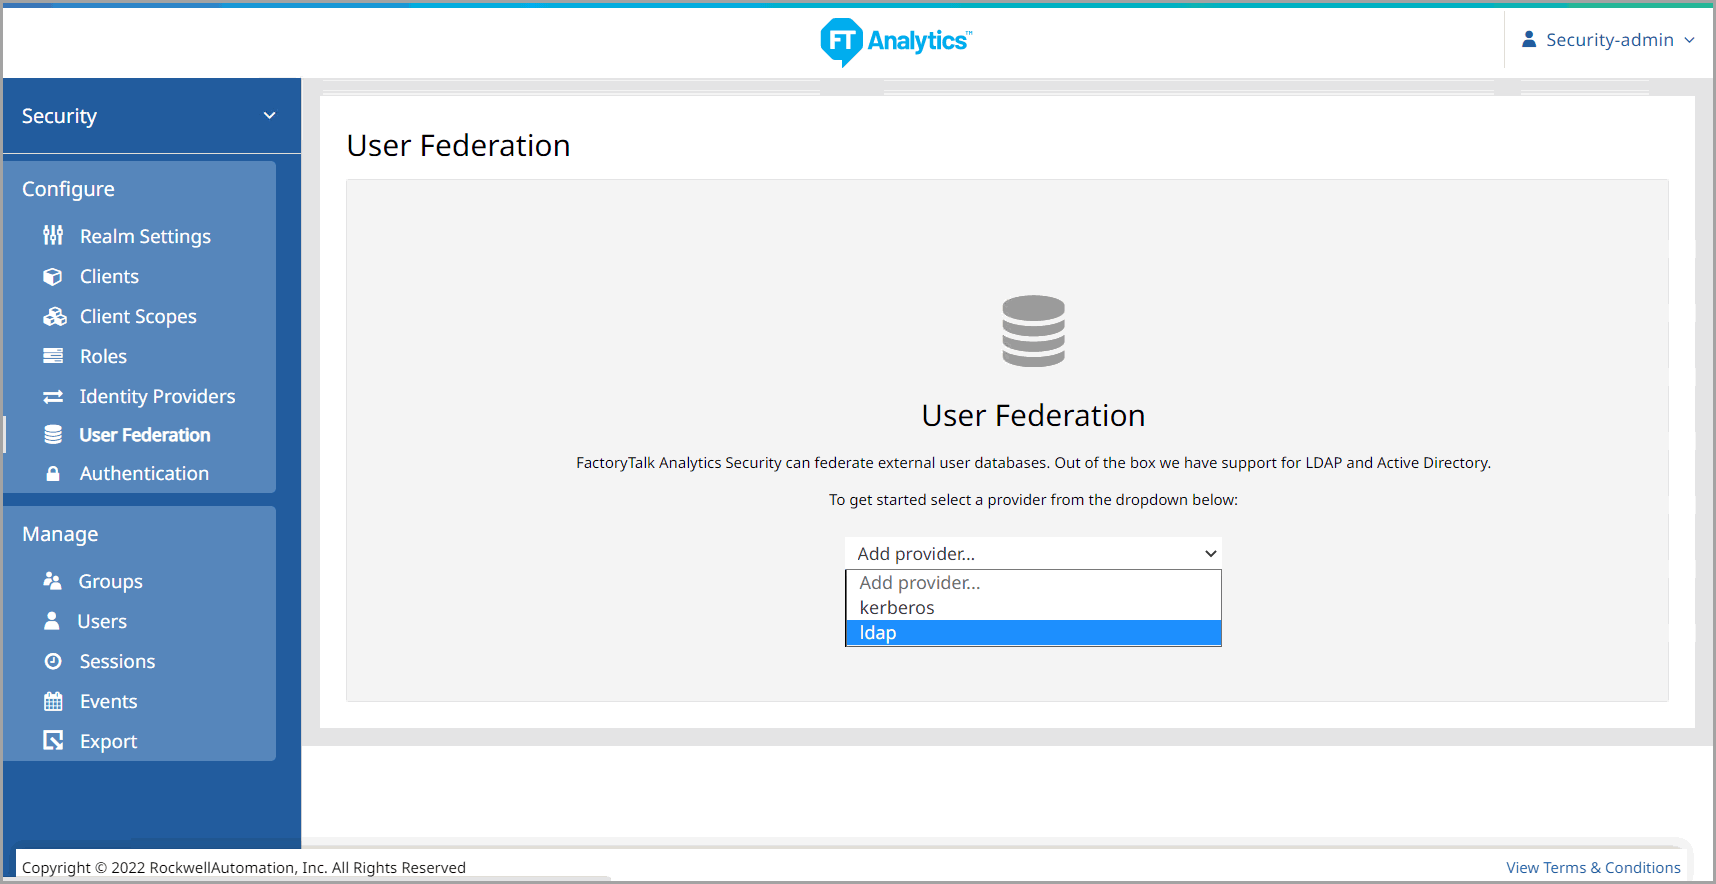
- Navigate to the User Federation menu and select [ldap] from the [Add provider...] drop-down list.Vendor
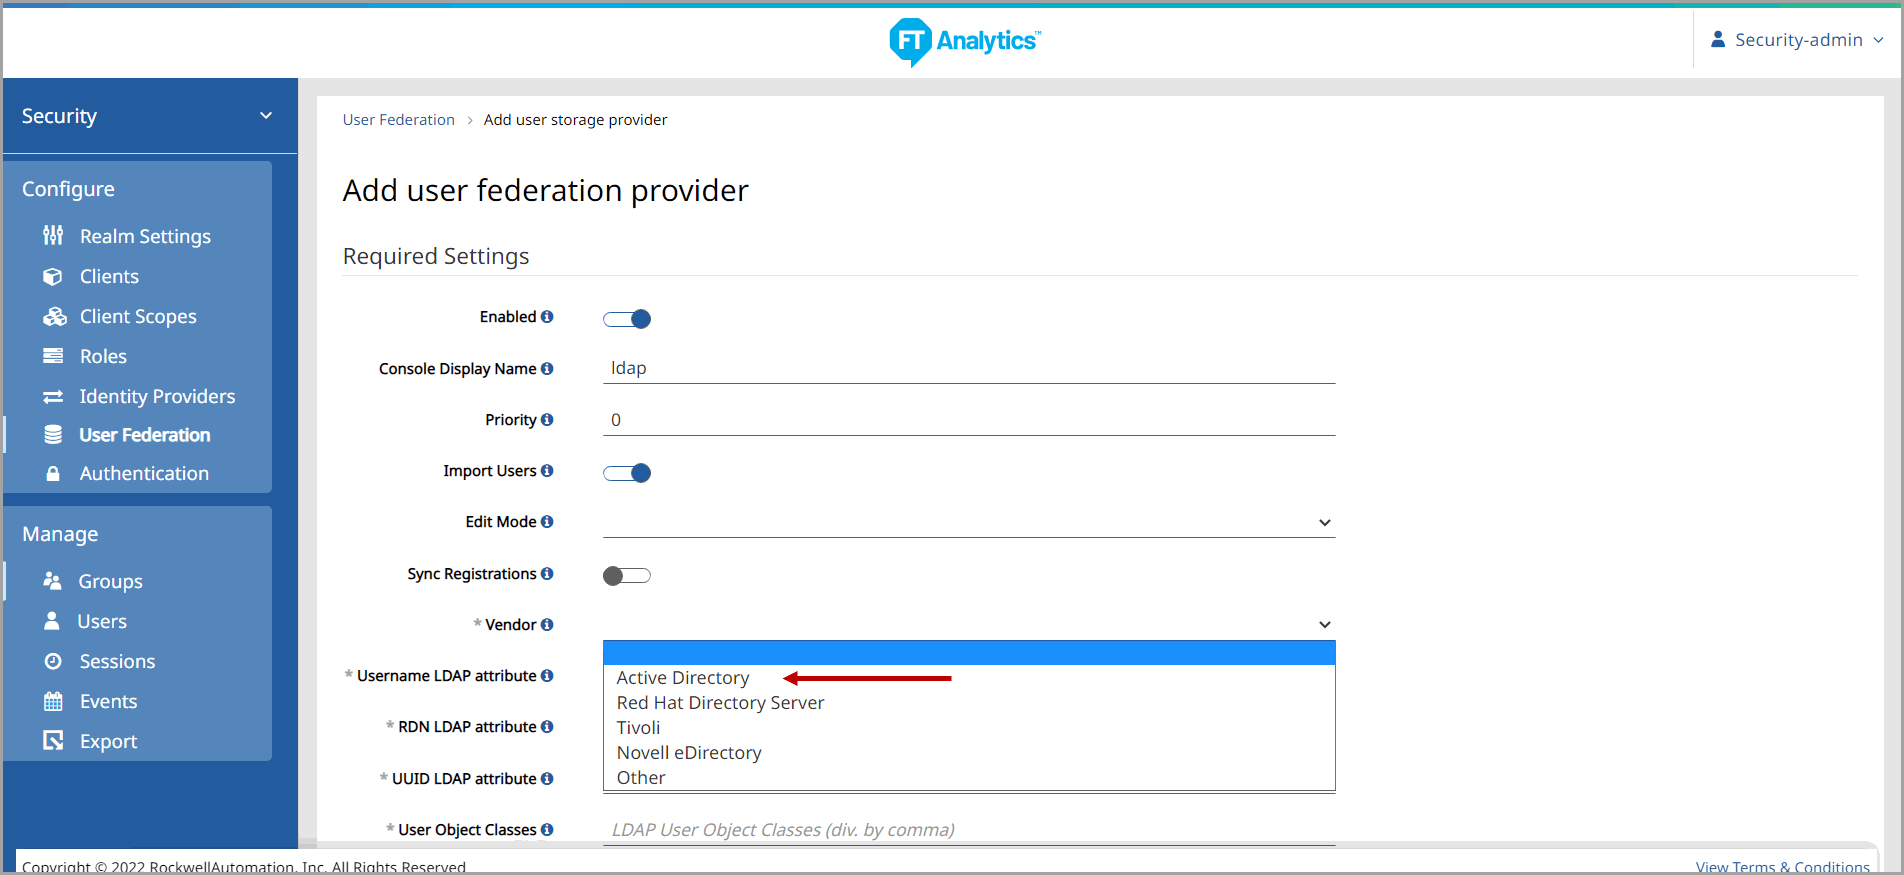
- Select [Active Directory] from the Vendor drop-down list.Vendor
- Enter the [Connection URL]ldaps://<windows server IP>:<LDAP port number>. The default LDAP port number is 636.For example: ldaps://192.168.10.45:636
- Click [Test Connection]. The success message displays.
- Enter the following details and click [Test Authentication]:
- Users DN
- Bind DN
- Bind Credential
The success message displays.User DN and Bind Credentials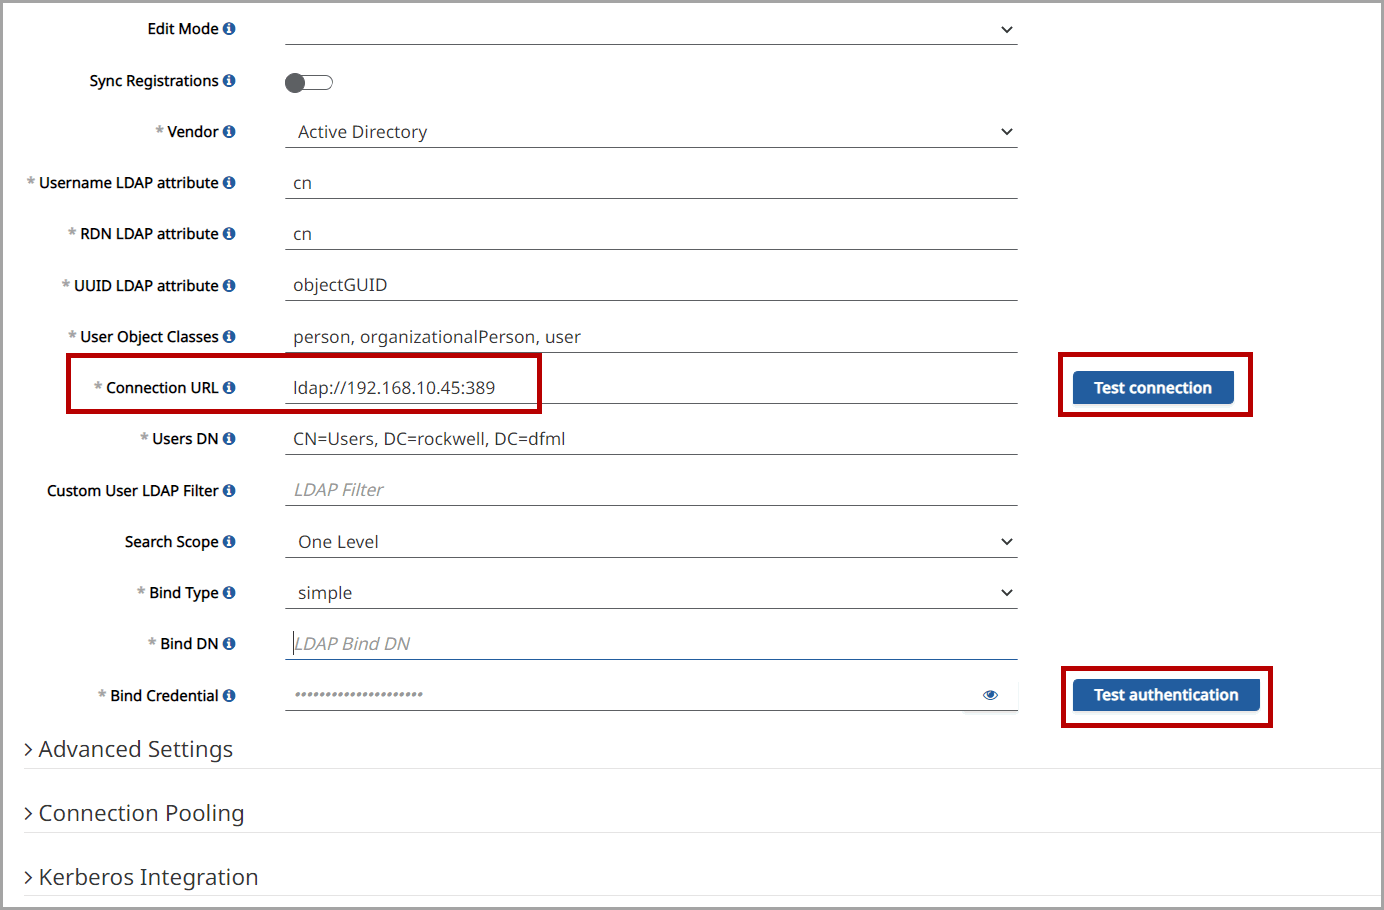
- Click [Save].
Provide Feedback