Import Data Files
To import data files into Data Explorer:
- Click the Import to Dataset icon.
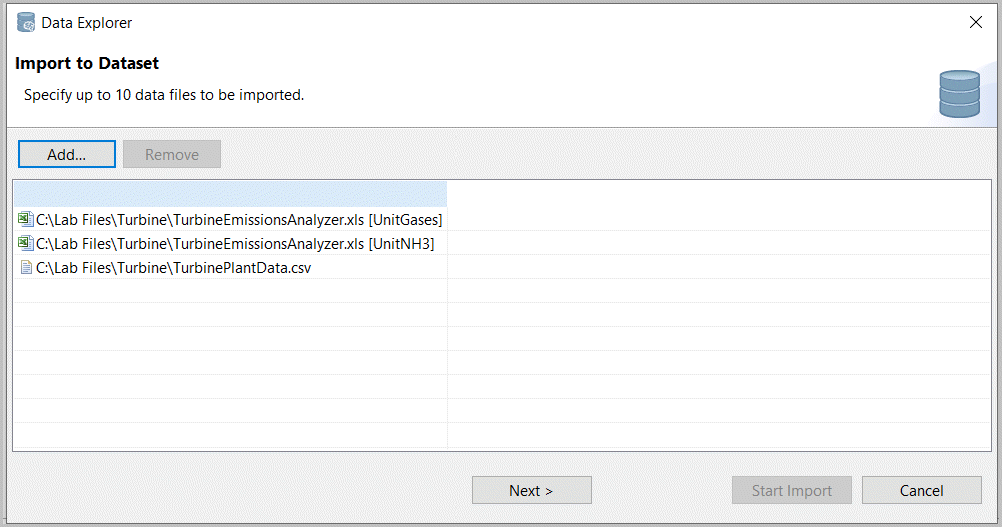
- In the Import to Dataset screen, click the Add icon [
 ] and select [Import to Dataset].
You can import up to 10 data files into a single dataset. Additional data files can be imported into another dataset. Also, if multiple files contain data on the same variables at different times (for example one file for January data and a different file for February), then you should use a text editor to combine the files before you import them or you may import one of the different files and subsequently, leverage the new “Add New Rows” option.
- Browse your Windows folders to your data files and click [Open]. Your files populate the Import to Dataset screen.Imported Data Files
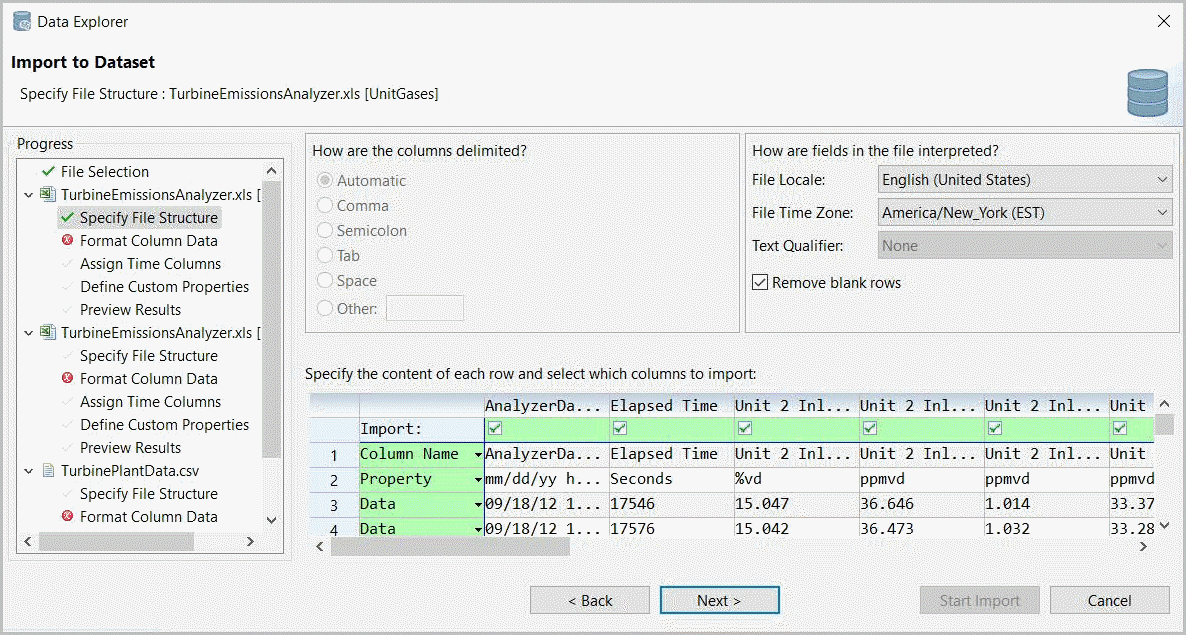
- Click [Next]. A preview of your data files' contents displays. The first file listed is selected by default.
When importing an XLS file, one entry will be created for each worksheet in the workbook. Remove any worksheets that are not desired for import.
Data File Preview

For each file, access the following screens by clicking the heading listed under the file name in the left panel or by clicking [Next] at the bottom of the right panel. The color of the cell indicates the following:
- Green: the cell value is editable.
- Red: information is missing or incorrect. Red cells must be addressed because they will keep the import from completely properly. A red X will display next to the heading if any cells are red. Scroll through the table to find the missing information and define it.
- Yellow: the cell value is questionable. Unlike a red cell, a yellow cell is more of a warning. It draws your attention to questionable input but will not block the import operation.
Please note the following when editing your data:
- You can define the value for a single cell by clicking on it to open a drop-down menu or to enter the text directly (depending on the value required).
- For values that are defined using a drop-down menu, you can define the value for a group of cells by selecting the group using the Shift key and then pressing your space bar to launch the drop-down menu dialog.
- Only one row can be defined as the Column Name row. If you change a row to be the Column Name row, then the existing Column Name row is automatically changed to a Property that may be identified later.
- If any of your Column Name cells are red, hover your cursor over the cell and a pop-up dialog displays indicating the issue with the name (for example, an illegal../../../../factorytalk-analytics-augmented-modeler/factorytalk-analytics-augmented-modeler/factorytalk-analytics-augmented-modeler/factorytalk-analytics-augmented-modeler/factorytalk-analytics-augmented-modeler/factorytalk-analytics-augmented-modeler/4-00-00/2_1_FactoryTalk_DataExplorerUserGuide_Rev01/images/import-datafiles-cellerror.png character). Sometimes there are processing delays on pop-up generation.
- If your file contains other information (for example, units or Tag names), mark this information as a Property to retain it with the imported data.
- When a column is correct or updated, the view automatically resets to scroll all the way left.Data Error

Additional methods for editing and defining values are noted in the individual screen descriptions.
- Specify File Structure: use this screen to define how the rows are delimited and which columns are included.
- How are the columns delimited:choose how your columns are delimited. The importer will usually be able to determine the delimiter used in the file. Verify this field and correct it if necessary.
- File Locale: define the file's locale from the drop-down menu. This defaults to the system setting on your computer. Change the locale if the file's number format does not match your locale.
- File Time Zone: define the file's time zone from the drop-down menu. This defaults to the system setting on your computer. Change the time zone if you want the importer to convert the times to match your system. This property is only used for time-stamp data in the file that does not explicitly specify a time zone.
- Text Qualifier: define the text qualifier used to enclose a single field. Double quotes are used by default. This property is used if your variable names, property contents, or string data is delimited with or contains a single or double quote. Otherwise, leave it at the default.
- Remove blank rows: select this checkbox if you want the import to remove any blank rows. This option is selected by default.Specify File Structure
- Format Column Data: use this screen to modify the column names, data types, and time formats. Changes can be manual or automatic.
- [Correct Column Names]: click this button to automatically correct any column names by making them unique and removing illegal characters. The variable name requirements are
- A maximum length of 72 characters.
- Not case sensitive (for example, AAA and aaa are not both allowed).
- Legal characters are ASCII-32 through 126 except they cannot include any of bang/exclamation, double-quote, or curly braces (ASCII-33, 34, 123, 125).
- [Choose Data Types]: click this button to automatically define any missing data types to the default (frequently real/float). The wizard will not automatically guess data types when there is ambiguity. This button forces the wizard to make the best choice from the available data. Note the following when using this button:
- The parser attempts to identify data types, but it cannot always make a correct choice. Please review the data types and repair them if needed.
- Date/Time variables can easily be misidentified as String, so be careful to check them all.
- Even if a Date/Time variable is correctly identified, its interpretation shown in the Format Date row can easily be incorrect. To correct this, click in that cell to open the Edit DateTime Format dialog and type in the correct interpretation.
- If data values are empty or ambiguous, the data type is listed as Unknown and is highlighted in red. The Choose Data Types button will change all the Unknown data types to a numeric type.
When using either of these buttons, you should review the results to make sure they are appropriate.Note the red cells in Figure 2-8. This indicates an unknown data type. Values that are blank for the initial 1000 rows have an unknown data type and display as red. In this example, these tags are ppmvd and %vd (parts per million, volumetric dry and percent volumetric dry) units. Because of this, assume these are not String tags but Double (real) tags that are gathered (measured or archived) after the start of data collection.Format Column Data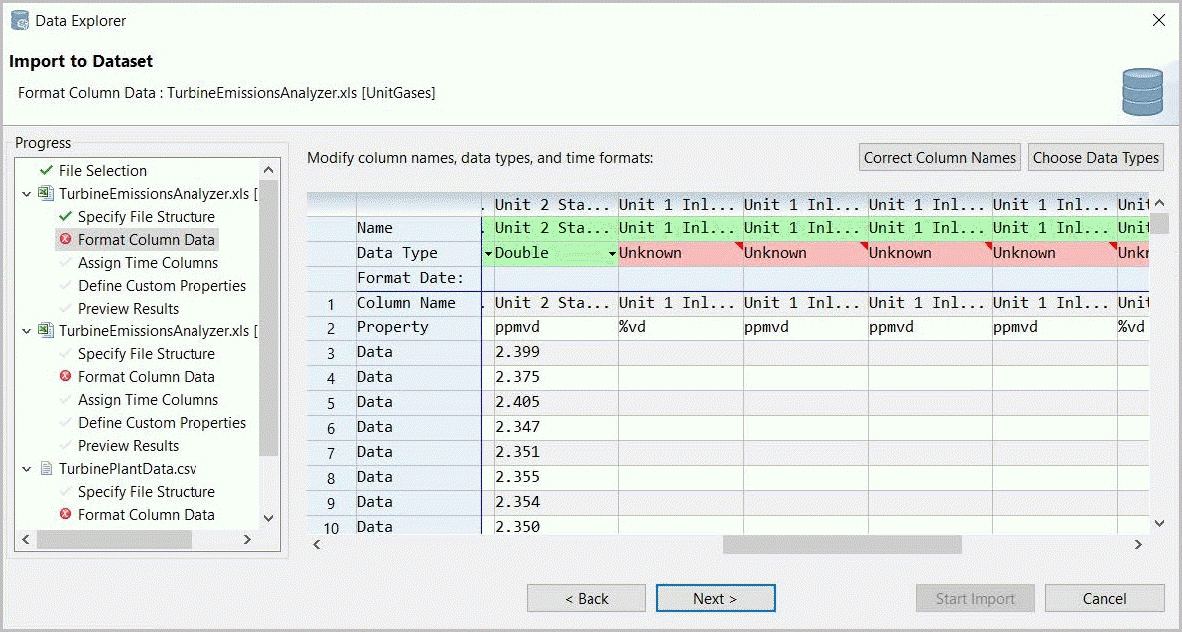
- Assign Time Columns: use this screen to assign a DateTime or Date column to each value column and a Time column to each Date column.Data Explorer will guess that a column is of type DateTime based on the column content. but this can be changed. Please note the following:
- Default assignments are made in this screen only for Date, Time, and Date/Time variables that were automatically identified in the Format Columns screen. If changes were made to any of these data types in the Format Columns, then they are not selected in the initial assignments.
- The default assignments are each Time-only column to the first Date-only column to its left, and each data column to the first Date-only or Date-time to its left.
- TheReassign Date and Timebutton recalculates the default assignments using the current set of column data types. If something was initially called a String but was manually changed to Date/Time, then it would not have been used in the initial Time Column assignments, but it can be used by theReassign Date and Timebutton.
- A data file can legitimately have no date/time information. If the file does have date/time information, then there is a warning for any data column without a date/time reference.
Click [Reassign Date and Time] to assign the default date/time to each cell in the Date/Time row.Assign Time Columns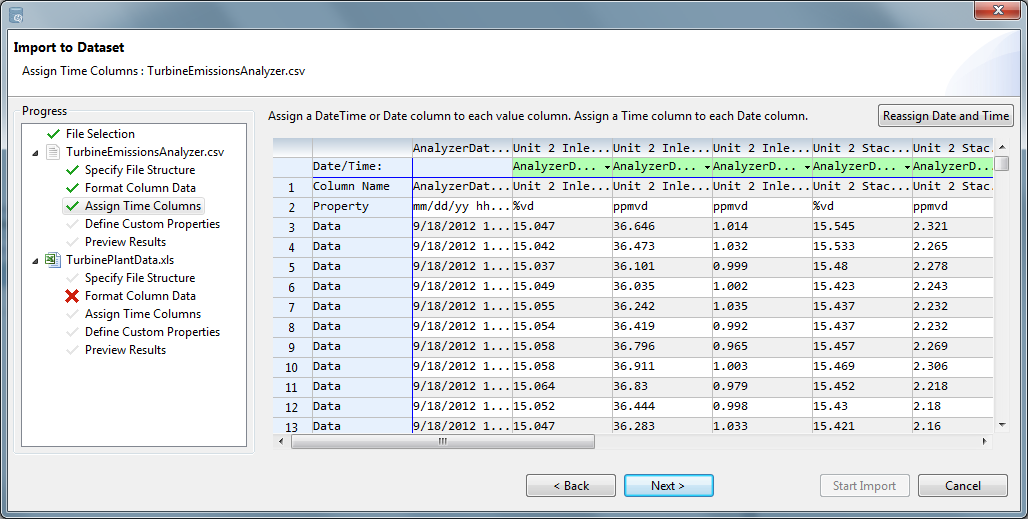
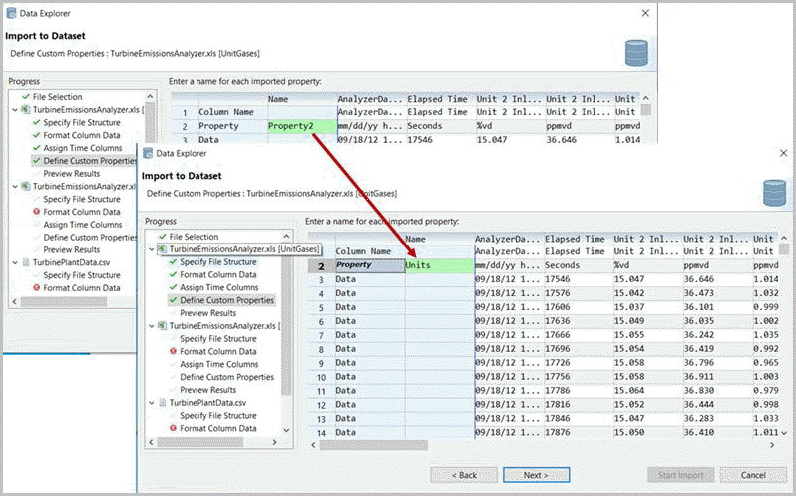
- Define Custom Properties: use this screen to define a name for any imported property.TIP:Assigning a property name that is common across multiple data files allows you to use (e.g., on labels) or search for common data based on selected properties.Define Custom Properties
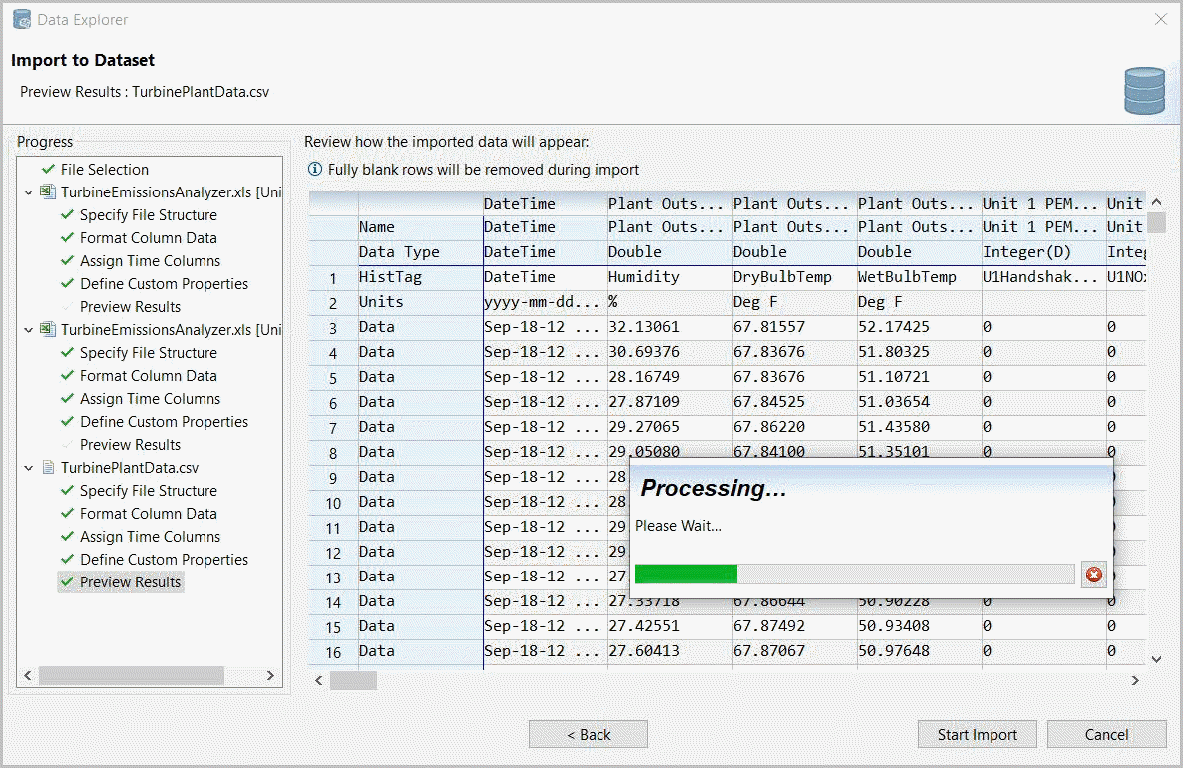
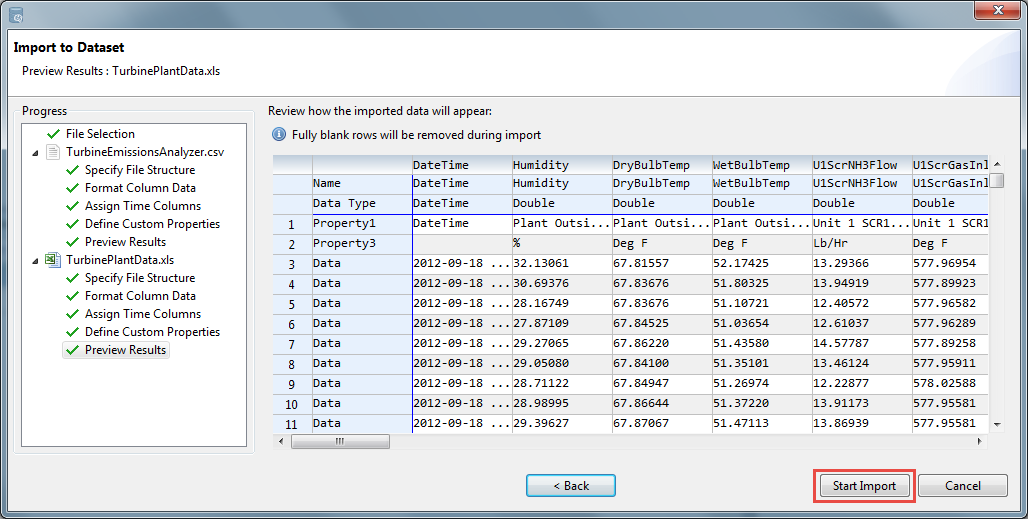
- Preview Results: use this screen to review how your imported data will appear.
IMPORTANT:
Make sure to verify that Date/Time columns are interpreted correctly, data types are correct, and Time columns are assigned correctly. If any of these are incorrect, they cannot be repaired in the imported dataset, and the import must be redone.
Preview Results
- After you have edited and defined the data in all your imported files, click [Start Import]. This button is enabled as soon as all necessary information is supplied or guessed by the wizard (i.e., there are no errors remaining). However, it is recommended that you click through and verify the information at each step.Start Import
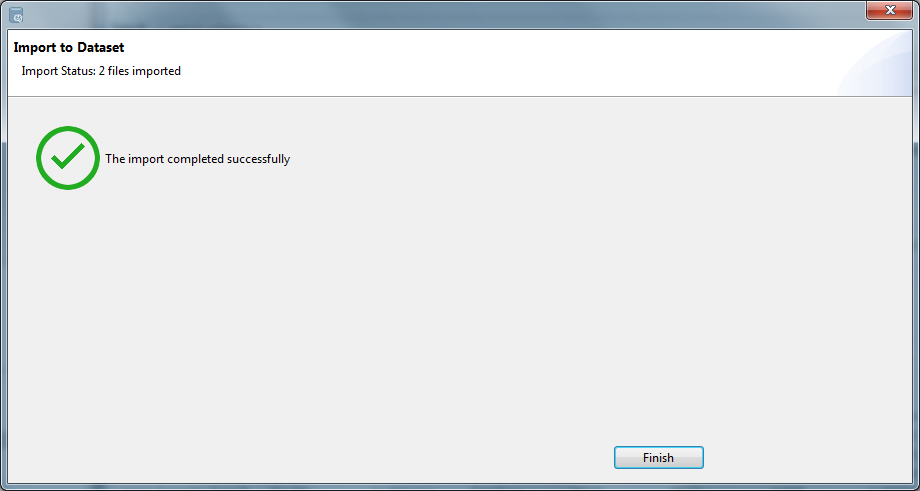
- When the files have been successfully imported, click [Finish] to close the wizard.Completed Import
Provide Feedback