Configuring OSI PI Extractor
Introduction
This page describes the steps to configure FTDM, CDF and the CDF OSIPI extractor in order for OSI PI (FT Historian) data to egress to CDF. It is assumed that a CDF Project has been created using FTDM. It is also assumed, for this example, that an OSI PI Server is running and accessible
Create a Dataset in the CDF project
- Navigate to your project in CDF.
- Navigate toExplore > Use the Data Catalogand click [Create a D
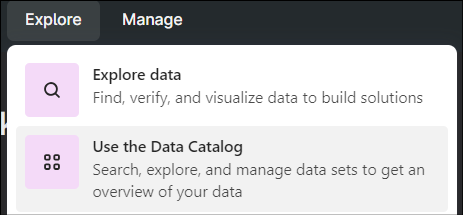
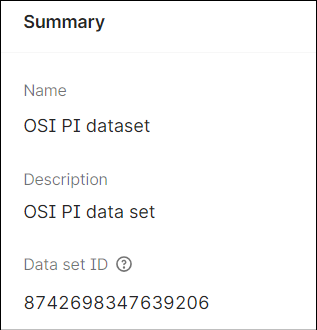
- Provide the basic information for the data set and click [Create].
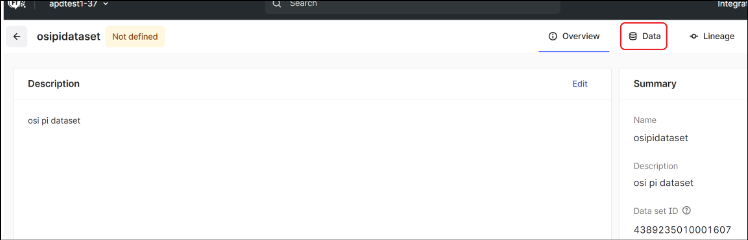
- Open the data set and note down theData set IDfor later use.
Create a Pipeline in the CDF project
- Navigate to your project in CDF and selectIntegrate > Monitor Extractors.
- On the Extraction pipelines screen, click [Create extraction pipeline].
- Select theData setcreated earlier.
- Provide the basic information for the extraction pipeline and click [Create].
Register an OSI PI Extractor
- On the FactoryTalk DataMosaix Management Console, select theExtractor Infotab.
- Click the [Add] icon.
- On the Extractor Info Detail screen, provide a unique and meaningful name for the extractor.
- In the Pipeline field, provide the extraction pipeline name created earlier.
- Select the Source Type as FT Historian.
- Click Save and Create Credentials to register the extractor.
- Copy and save the client secret information.
Download the OSI PI Extractor
- Navigate to your project in CDF and selectIntegrate > Connect to source systems.

- On the Extract data screen, locate theCognite PIextractor and select it.
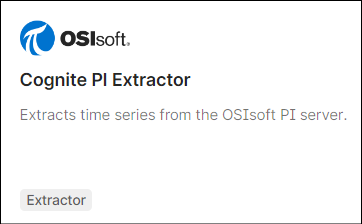
- Select the download option that suits the on-prem environment on which the extractor is to be installed.NOTE:You will need to run this installer as a local admin on the on-prem machine.
After this you can configure the PI (FT Historian) extractor on-prem or with minimal configuration on the CDF portal application.
Configure the OSI PI Extractor on-prem
This section provides information about on-prem configuration file to allow the OSI PI extractor to connect to and push data to the CDF project.
Install the extractor downloaded earlier.
Navigate to the config sub-folder of the installed/extracted folders and create or edit the config.yml file. Note that the secret field in idp-authentication is an environment variable on the machine running the extractor.
The following snapshot shows the configuration file for the setup described in the steps above. Note that the secret field in idp-authentication is an environment variable on the machine running the extractor.
# Version of this configuration schema
version: 3

# Configuration related to Cognite Data Fusion (CDF)
cognite:

    # CDF project. The sample below refers to the COGNITE_PROJECT environment variable.
    project: apdtest1-37

    # Config for authentication if a bearer access token has to be used for authentication.
    # Include to enable, exclude to disable
    idp-authentication:

        # URL to fetch tokens from, either this, or tenant must be present.
        token-url: "https://datamosaix-prod.us.auth0.com/oauth/token"
        audience: "https://cognitedata.com"

        # Application Id
        client-id: client Id of FTDM Extractor

        # Client secret
        secret: ${COGNITE_OSIPI_CLIENT_SECRET}

    # Root url to use for CDF
    host: "https://westeurope-1.cognitedata.com"

    # Configure an extraction pipeline manager
    extraction-pipeline:
        # ExternalId of extraction pipeline
        pipeline-id: pipeline External Id
        # Frequency to report "Seen", in seconds. Less than or equal to zero will not report automatically.
        frequency: 600

# Configuration related to time series in CDF
time-series:
    # External Id prefix to identify time series in CDF. Leave empty for no prefix.
    # The external Id in CDF is this optional prefix followed by the PI Point name or id

    external-id-prefix: "pi_"

    # The source of the external id. Either Name or SourceId. By default the PI Point name is used as source.
    # If SourceId is selected, then the PI Point ID is used
    #external-id-source: PI

    # Data set to assign to all time series controlled by the extractor, both new
    # and current time series sourced by the extractor. When not configured, the extractor
    # does not change the current time series data set.
    # The data set is specified with the internal id (long).
    data-set-id: 4389235010001607

# Configuration related to the PI Server
pi:

    # PI Data Archive host server to connect to
    host: ascvbvis1005

    # Use native PI user authentication if true or Windows authentication if false.
    native-authentication: false

# Saves the extraction state periodically so that extraction can be resumed faster on the next run.
state-store:
    # Which type of database to use. One of "None", "Raw", "LiteDb"
    database: LiteDb
    location: "buffer.db"

# Common config for the operation of the extractor itself, and other misc options
extractor:

    # Interval for how often the server is checked for newly added PiPoints while running, in seconds.
    # If 0 or less the active points are not updated
    #time-series-update-interval: 86400

    # The extractor behavior when it encounters time series in the destination
    # that cannot be found in the source.
    deleted-time-series:

        # Action taken by the extractor. One of 'none', 'flag' or 'delete'. The default is to ignore it: 'none'.
        # 'flag' will perform soft deletion: Just flag the time series as deleted but do not remove them from the destination.
        # 'delete' will delete the time series from the destination
        behavior: "delete"

# Log levels: 'verbose', 'debug', 'information', 'warning', 'error', 'fatal'.
logger:

    # Writes log events at this level to the Console.
    # If not present, or if the level is invalid, Console is not used.
    #console:
        #level: "information"

    # Writes log events at this level to a file. Logs will roll over to new files daily.
    # If not present, or if the level is invalid, logging to file is disabled.
    file:
        level: "debug"

        # Path for logging output. If not present, logging to file is disabled.
        path: "logs/log.txt"

        # Maximum number of logs files that are kept in the log folder.
        #retention-limit: 31
The following fields in the config file mentioned above are likely to be specific to your environment
- project: this will be the name of your CDF project
- client-id: this is the Client ID noted when you registered the extractor on FTDM
- secret: this is the Client Secret noted when you registered the extractor on FTDM. You will need to edit or create a system environment variable called “COGNITE_OSIPI_CLIENT_SECRET“ to hold this value.
- pipeline-id: the “External id” of the pipeline created in the step described earlier on this page
- data-set-id: this is the value noted in the step described earlier on this page
- host: the name of your Server hosting OSIPI (FTHistorian) (this will be localhost or the local machine name if it is on the same machine as the extractor)
- token-url: this is the OAuth Token URL endpoint on the FTDM Auth0 Idp.https://datamosaix-prod.us.auth0.com/oauth/token
Configuration through Pipeline in CDF
This section describes how to configure the OSI PI Extractor using a configuration that is stored on the CDF web site. A very minimal configuration file is also required on-prem. This minimal on-prem configuration file is required in order for the extractor to establish an authorized connection to the CDF host site.
Minimal on-prem Configuration for the PI Extractor
The following example shows the very minimal configuration file that is required on-prem. This file contains only the information required to establish an authorized connection to the Cognite API, to connect to the “named” CDF project and to identify the pipeline to be used on that project.
Note that the “type” field here is “remote”
type: remote

# Configuration related to Cognite Data Fusion (CDF)
cognite:

    # CDF project. The sample below refers to the COGNITE_PROJECT environment variable.
    project: apdtest1-37

    # Root url to use for CDF
    host: "https://westeurope-1.cognitedata.com"

    # Config for authentication if a bearer access token has to be used for authentication.
    # Include to enable, exclude to disable
    idp-authentication:

        # URL to fetch tokens from, either this, or tenant must be present.
        token-url: "https://datamosaix-prod.us.auth0.com/oauth/token"
        audience: "https://cognitedata.com"

        # Application Id
        client-id: Yg9EgGNTiIZEaDZhdGuBEtsJBE42byYO

        # Client secret
        secret: ${COGNITE_OSIPI_CLIENT_SECRET}

    # Configure an extraction pipeline manager
    extraction-pipeline:
        # ExternalId of extraction pipeline
        pipeline-id: 12345678
        # Frequency to report "Seen", in seconds. Less than or equal to zero will not report automatically.
        frequency: 600
For your installation you may need to change some of these values shown above to match your own environment.
token-url: this is the OAuth Token URL endpoint on the FTDM Auth0 Idp.
https://datamosaix-prod.us.auth0.com/oauth/token
Pipeline Configuration for the OSI PI Extractor
With the above on-prem configuration in place, the following steps will place the remainder of the extractor’s configuration into the pipeline of the CDF project named in the section above.
Navigate to your pipeline by selecting
Integrate > Monitor Extractors
. Browse to the “Configuration file for extractor” section and paste the configuration there.
The snippet below shows an example of the configuration that will be appropriate in this field of the pipeline.
Note: it does not contain any of the information supplied in the on-prem configuration file described in the previous section
# Version of this configuration schema
version: 3

# Configuration related to time series in CDF
time-series:
    # External Id prefix to identify time series in CDF. Leave empty for no prefix.
    # The external Id in CDF is this optional prefix followed by the PI Point name or id

    #id-prefix: "picloudconfig_"
    external-id-prefix: "picloudconfig_"

    # The source of the external id. Either Name or SourceId. By default the PI Point name is used as source.
    # If SourceId is selected, then the PI Point ID is used
    #external-id-source: PI

    # Data set to assign to all time series controlled by the extractor, both new
    # and current time series sourced by the extractor. When not configured, the extractor
    # does not change the current time series data set.
    # The data set is specified with the internal id (long).
    data-set-id: 3003051048944763

# Configuration related to the PI Server
pi:

    # PI Data Archive host server to connect to
    host: ascvbvis1005

    # Use native PI user authentication if true or Windows authentication if false.
    native-authentication: false

# Saves the extraction state periodically so that extraction can be resumed faster on the next run.
state-store:
    # Which type of database to use. One of "None", "Raw", "LiteDb"
    database: LiteDb
    location: "buffer.db"

# Common config for the operation of the extractor itself, and other misc options
extractor:

    # Interval for how often the server is checked for newly added PiPoints while running, in seconds.
    # If 0 or less the active points are not updated
    time-series-update-interval: 60

    # The extractor behavior when it encounters time series in the destination
    # that cannot be found in the source.
    deleted-time-series:

        # Action taken by the extractor. One of 'none', 'flag' or 'delete'. The default is to ignore it: 'none'.
        # 'flag' will perform soft deletion: Just flag the time series as deleted but do not remove them from the destination.
        # 'delete' will delete the time series from the destination
        behavior: "delete"

frontfill:

    # If true, don't stream or frontfill data.
    skip: false

    # Interval in seconds between each call to the stream service
    streaming-interval: 60

    # If true, data points deleted in the source system will also be deleted in the destination.
    #delete-data-points: false

    # Older PI servers may not support data pipes. In this case data pipe streaming should be disabled by setting this to 'false'.
    # The frontfiller will run constantly, and will frequently query PI for new data points
    #use-data-pipe: true

# Log levels: 'verbose', 'debug', 'information', 'warning', 'error', 'fatal'.
logger:

    # Writes log events at this level to the Console.
    # If not present, or if the level is invalid, Console is not used.
    console:
        level: "information"

    # Writes log events at this level to a file. Logs will roll over to new files daily.
    # If not present, or if the level is invalid, logging to file is disabled.
    file:
        level: "error"

        # Path for logging output. If not present, logging to file is disabled.
        path: "logs/log.txt"

        # Maximum number of logs files that are kept in the log folder.
        #retention-limit: 31
Running the Extractor
Navigate to the installed location of the extractor (lets consider installed location is, c:\cdf extractors\piextractor\bin) and run the following command.
PIExtractor.exe -w “c:\cdf extractors\piextractor”
The above command is applicable if the extractor has been installed to a folder called “cdf extractors”. Modify the command as per your configuration
Alternatively, navigate to the c:\cdf extractors\piextractor folder and run the following command:
bin\PIExtractor.exe
Validate Extractor
- Once the extractor has been configured and executed successfully, navigate to your project in CDF Project and open the pipeline by selectingIntegrate > Monitor Extractors.
- Click the pipeline link.You should see the information mentioning that the extractor has run successfully.
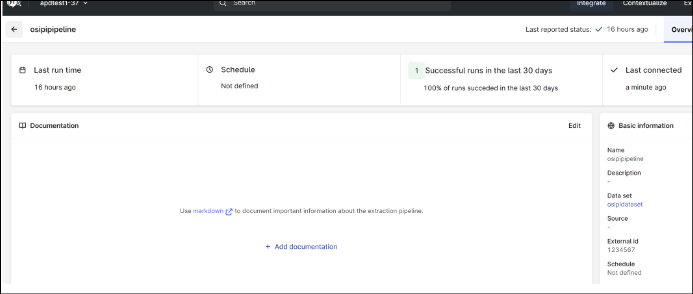
- Click on the Data set link under basic information section to open the Data set details.
- Click on the Data tab.You should see the asset and time series data. You may also see Assets depending on the configuration of the namespace on the PI Server.
Troubleshooting the OSI PI Extractor
- Use a Yaml Lint site to validate your yaml file.
- Look at the log file in the logging folder (as configured in the configuration file) for any error messages.
- Double-check your PI servername and, if necessary, the username, password. You may need quotes around username, password, servername.
- Double-check that all references to dataset and pipeline ids are correct.
- Double-check that the clientId and secret in the on-prem configuration file is correct.
- If you start the extractor but the dataset remains empty (no linked timeseries), this may be because the timeseries already existed before the extractor ran successfully and those timeseries are not linked to the datset. Try one of the following:
- Change the value of theexternal-id-prefixfield in the time-series section of the config yaml file and restart the extractor.
- Using postman or your favorite api client, delete all timeseries and restart the extractor.
Provide Feedback