Setting up alarms
Create and configure a set of objects required to display and record alarms.
Create and configure a set of objects required to display and record alarms:
- an object that reads a controller variable related to a digital alarm
- a widget to display and manage alarms in real time at runtime
- a logger and a database to record alarms
- a widget to display the history of events related to alarms
Because there is no connection to a controller, simulate the alarm activation via a switch or a button.
To remember:
- FactoryTalk Optix Studio includes many templates to add and configure various features, such as the widgets used in this module.
- Before configuring an object or a set of objects from zero, verify whether a suitable object is available in the template library
- The library is periodically updated on the occasion of new software releases.
Step #1: Configure the digital Alarm object
Configure the object that monitors the controller Boolean variable for the alarm.
- InProject, right-click theAlarmsfolder, then selectNew>Digital Alarm.DigitalAlarm1appears inAlarms.
- In theDigitalAlarm1properties, select
 next to the Input valueproperty and set a dynamic link with theMotor1Alarmalarm variable imported from the controller.
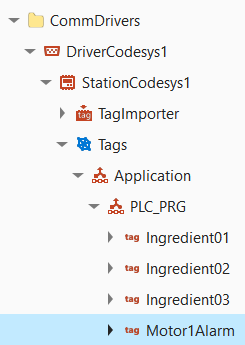
- In theMessageproperty, set the message to display at runtime on alarm activation, for example “Alarm on motor1”.
The
Value status normal
property is set to 0
by default. This activates the alarm when the Motor1Alarm
variable value becomes 1
. The other properties are set by default according to the typical use of digital alarms.Step #2: Configure the widget to display the alarms in real time
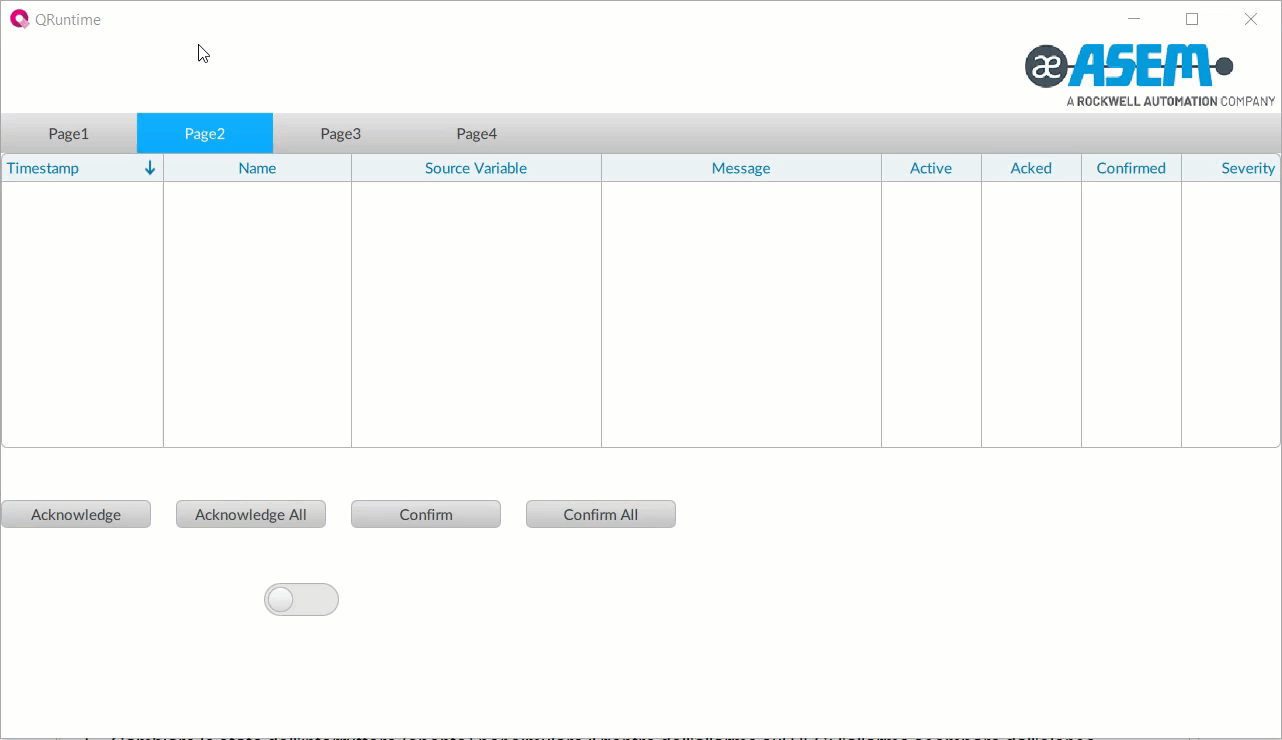
Add and configure the widget in
Page2 (type)
.- Select
 in the main toolbar: the template library opens.
 - InWidgets, drag theAlarm gridwidget intoPage2 (type). TheAlarmGrid1object appears inPage2 (type).
- Close the template library.
- InProject, double-clickPage2 (type)to display the panel in the editor.
- SelectAlarmGrid1and set itsHorizontal alignmentproperty toStretch.to adjust the width of the container.
Step #3: Configure logger and database to store the alarms
From the template library, add and configure an alarm logger and configure a database to store the data recorded by the logger:
- Select in the main toolbar. The template library opens.
- InMisc, drag theAlarms Event Loggerobject into theLoggersfolder. TheAlarmsEventLogger1object appears inLoggers. This widget records all alarms at runtime.
- Close the template library.
- To create a database, inProject, right-clickDataStoresand selectNew>Embedded Database.EmbeddedDatabase1appears.
- RenameEmbeddedDatabase1toAlarmDB.
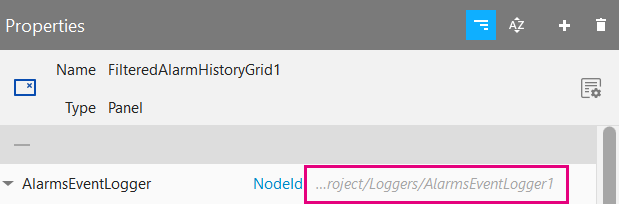
- To set the database in which to store the alarms recorded by the logger, clickAlarmsEventLogger1, and in itsDatabaseproperty set a dynamic link withAlarmDB.
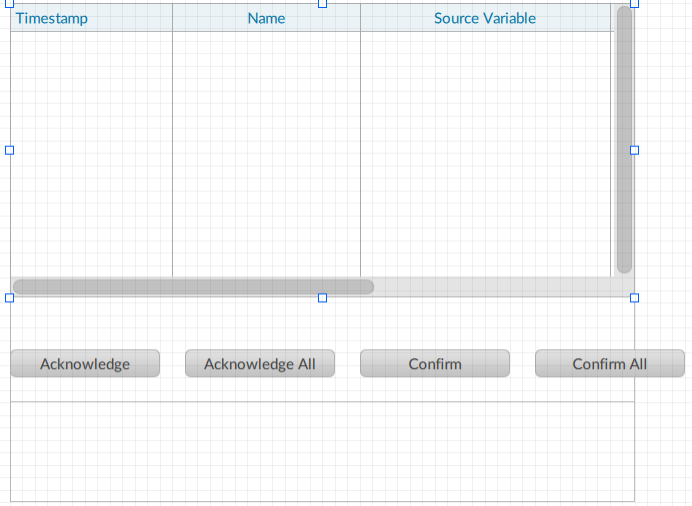
Step #4: Configure the widget to display the alarms history
Add and configure the widget in
Page3 (type)
.- Select in the main toolbar. The template library opens.
- InWidgets, drag theAlarm history gridwidget intoPage3 (type). TheFilteredAlarmHistoryGrid1object appears inPage3 (type).
- Close the template library.
- InProject, double-clickPage3 (type)to display the panel in the editor.
- SelectFilteredAlarmHistoryGrid1and set theHorizontal alignmentproperty toStretchto adjust the container width.
- DragAlarmsEventLogger1onto the value of theAlarmsEventLoggerproperty to display the data recorded by the logger.
Step #5: Configure the switch to simulate alarms
To simulate the activation of an alarm on the controller, configure a
Switch
object to change the status of the Motor1Alarm
variable.- InProject, double-clickPage2 (type).
- Right-clickPage2 (type)and selectNew>Basic controls>Switch.Switch1appears inPage2 (type)and in the objects editor.
- Drag the switch to the bottom part of the panel as shown in the example.
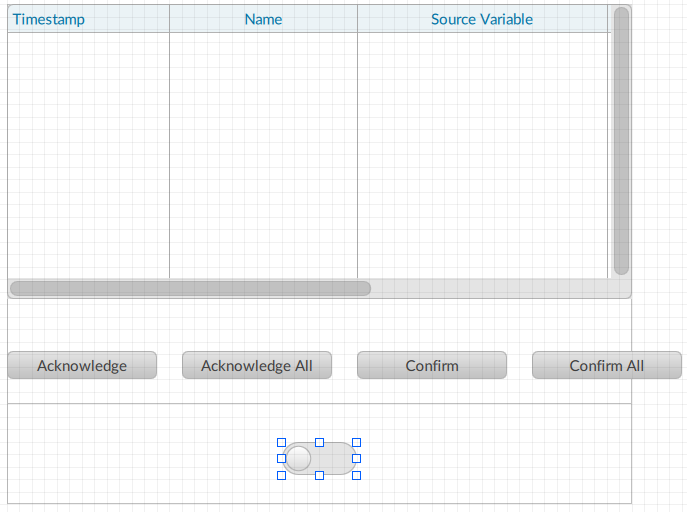
- In the switchActiveproperty, set a dynamic link withMotor1Alarm. The Boolean value ofMotor1Alarmdepends on the switch status.
Step #6: Check the operation at runtime
- The inserted widgets require space in width to display properly at runtime. IinProject,selectMainWindow (type)and setWidthandHeightto 1024 pixels and 560 pixels respectively.
- Select
 Emulatorand wait for the runtime window to appear.
 - SelectPage2. To simulate the alarm activation on the controller, change the switch status (on): the alarm grid displays the alarm data.
- Select the alarm in the list and use acknowledge and confirm the alarm using the buttons.
- Change the switch status (off) to simulate the return of the alarm on the controller. The alarm disappears from the list.
- SelectPage3to display the history of the alarm events.
Provide Feedback