- Getting started
- Using the software
- OPC UA
- Graphic and layout objects
- Developing solutions
- Developing projects with C#
- Application examples
- UI tutorial
- NetLogic tutorial
- Object and variable references
Import and display controller variables
Import variables from a controller and graphically display the variables in the FactoryTalk Optix Application
Import variables from a controller to graphically display the value of a variable in the FactoryTalk Optix Application graphical interface. In subsequent modules, configure the display of alarms and configure recipes. To simulate the change of the variable value on the controller, configure a graphical object to change the value manually at runtime.
This is the result:

Step #1: Import the controller variables
To design applications that exploit the variables on the controllers, import the variables to the project. Import using a direct connection to the controller on the network (
online
mode) or import a variable file exported from the controller (offline
mode). For simplicity, import the variables from an XML file.Configure a specific
driver
object for the protocol of interest and a station
object for each specific controller that uses the same protocol.To create the objects and import the variables:
- InProject, right-click theCommDriversfolder, then selectNew>CODESYS driver:DriverCodesys1appears inCommDrivers. This object represents the CODESYS protocol.
- Right-clickDriverCodesys1and selectNew>CODESYS Station:CodesysStation1appears inDriverCodesys1. This object represents the controller. The connection parameters are available in the properties.
- InProject, expandCodesysStation1and selectTagImporter. this is the object to import the variables in online or offline mode.
- Set theModeproperty toOffline,. In theFile pathproperty selectBrowseand select the codesysTags.xml file downloaded previously.
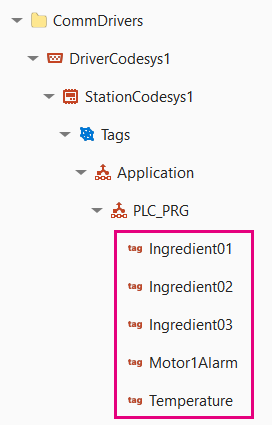
- Double-clickTagImporterto open the editor. Expand the nodes to display all variables present in the XML file.
- In thecontroller_PRGnode, select theIngredient01,Ingredient02,Ingredient03,Motor1AlarmandTemperaturevariables, then selectSynchronize. The variables are imported in the project, insideCodesysStation1>Tags.
Step #2: Organize the graphical objects
In
Page1 (type)
, create a label and a text box respectively, to describe and display the value of the controller variable. Next, create a linear gauge with to simulate the change of the controller variable value at runtime.
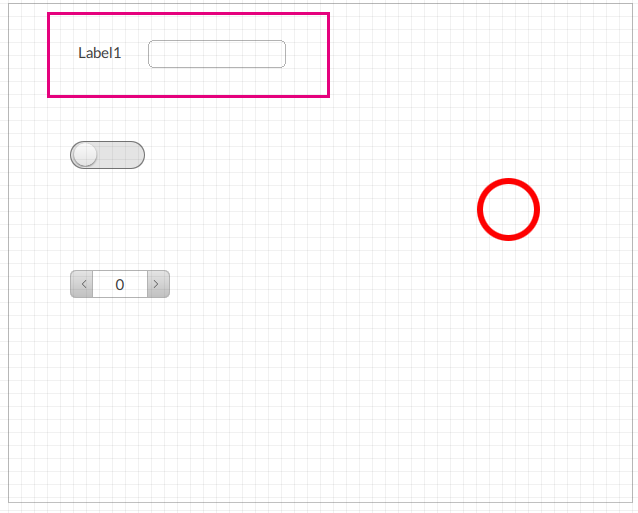
- InProject, right-clickPage1 (type), then selectNew>Basic controls>Label:Label1appears inPage1 (type).
- Repeat the procedure for the text box (Basic controls>Text box).

- Double-clickPage1 (type)to display the panel in the editor.
- Drag the objects to tile as shown.
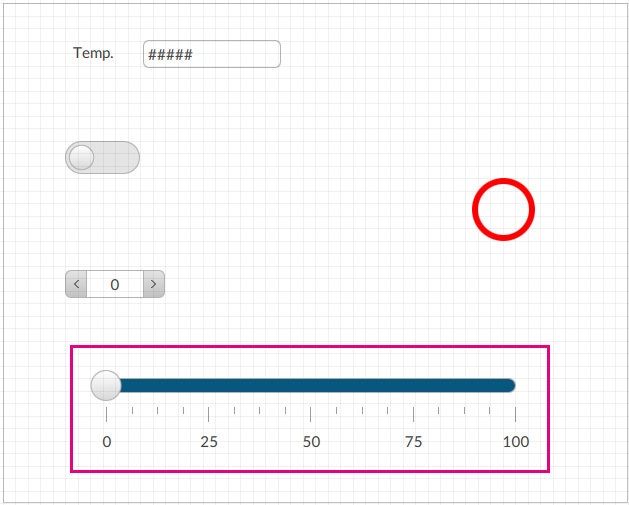
- InProject, right-clickPage1 (type), then selectNew>Basic controls>Linear gauge:LinearGauge1appears inPage1 (type)and in the editor.
- In the editor, position the linear gauge as shown in the example.
Step #3: Display the value of a controller variable
To display the value of the imported
Temperature
variable, set a dynamic link between the Text
property of TextBox1
and the value of the variable.- InProject, double-clickPage1 (type)to display in the editor.
- Drag theTemperaturevariable value to display in the text box. The text box appears in the editor.
 .NOTE: This method sets a dynamic link in theTextproperty of the text box.
 - Double-clickLabel1to update the text.

Step #4: Simulate the value change of the controller variable
The value of the
Temperature
variable is static, because the controller is not connected. To simulate the variable value change at runtime, configure LinearGauge1
.- InProject, selectLinearGauge1.
- In itsValueproperty, set a dynamic link with theTemperaturevariable.
- Select
 Emulatorand wait for the runtime window to appear.
 - To simulate the change in value of theTemperaturevariable on the controller, drag and release the linear gauge cursor. The updatedTemperaturevalue displays in the text box.
- Close the application window.
Provide Feedback