Add Asset
You can add assets directly under the Site or Area or Sub area. Perform the following steps to add assets to the hierarchy list:
- ClickConfiguration>Asset setupfrom the menu bar.
- Click the [
 ] icon from the Site or Area or Sub area in the hierarchy list and select [Add node].
 - In theAdd nodewindow, set these parameters:
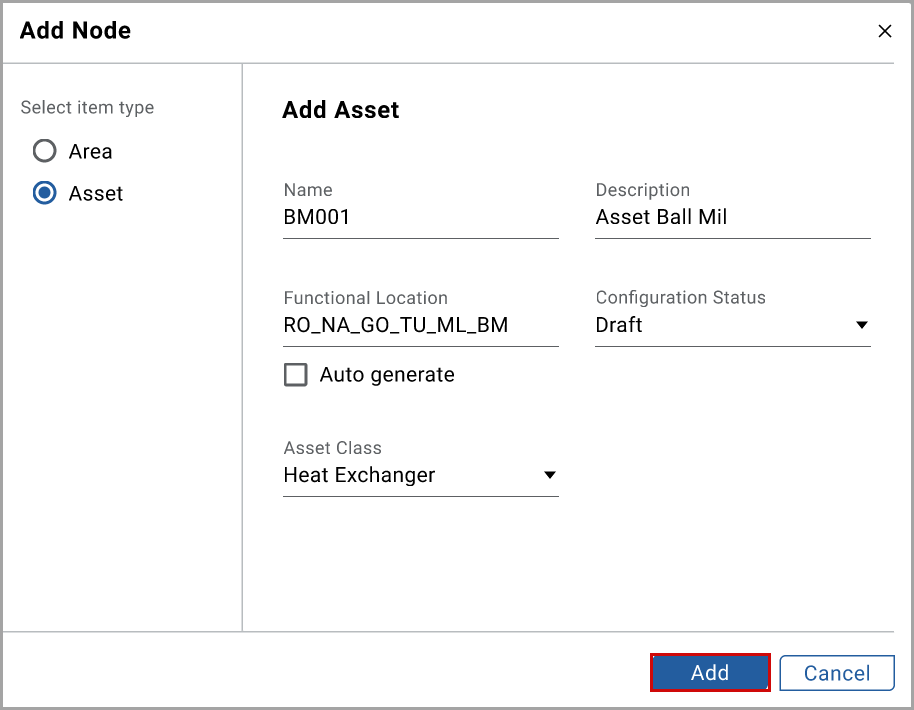
- Select item type: Select theAssetradio button in the left pane.
- Name: Provide the node name.
- Description: Provide the description of the node.
- Functional Location: Provide the location details.NOTE: Select theAuto generatecheck box to use the system-generated functional location.
- Configuration Status: Select the status from the drop-down list.
- Asset Class: Select the asset class from the drop-down list.
- Click [Add].Add Asset
 The "Asset is added under the Site, or Area, or Sub area successfully" message displays.
 - (Optional) In theInfotab, click [Edit] and perform the following actions:
- Geographical Location: Provide the geographical location.
- Contact Details: Provide the contact details.
- Remarks: Provide the remarks.
- Make: Provide the asset make details.
- Commission Date: Select the commission date using the date picker.
- Lifecycle Status: Select the lifecycle status from the drop-down list.
- Files Uploaded: Click [Browse] to upload the files related to the asset.
- Click [Save].
Now that you have an Asset Defined, you can create Components, KPIs, Sensors etc. There are two ways to do that. The first is to apply an existing Asset Model to that Asset, or you can create everything manually. The following sections cover both topics.
Provide Feedback