Add Component
Perform the following steps to add a component to the hierarchy list:
- ClickConfiguration>Asset setupfrom the menu bar.
- Click the [
 ] icon from the asset in the hierarchy list and select [Add node].
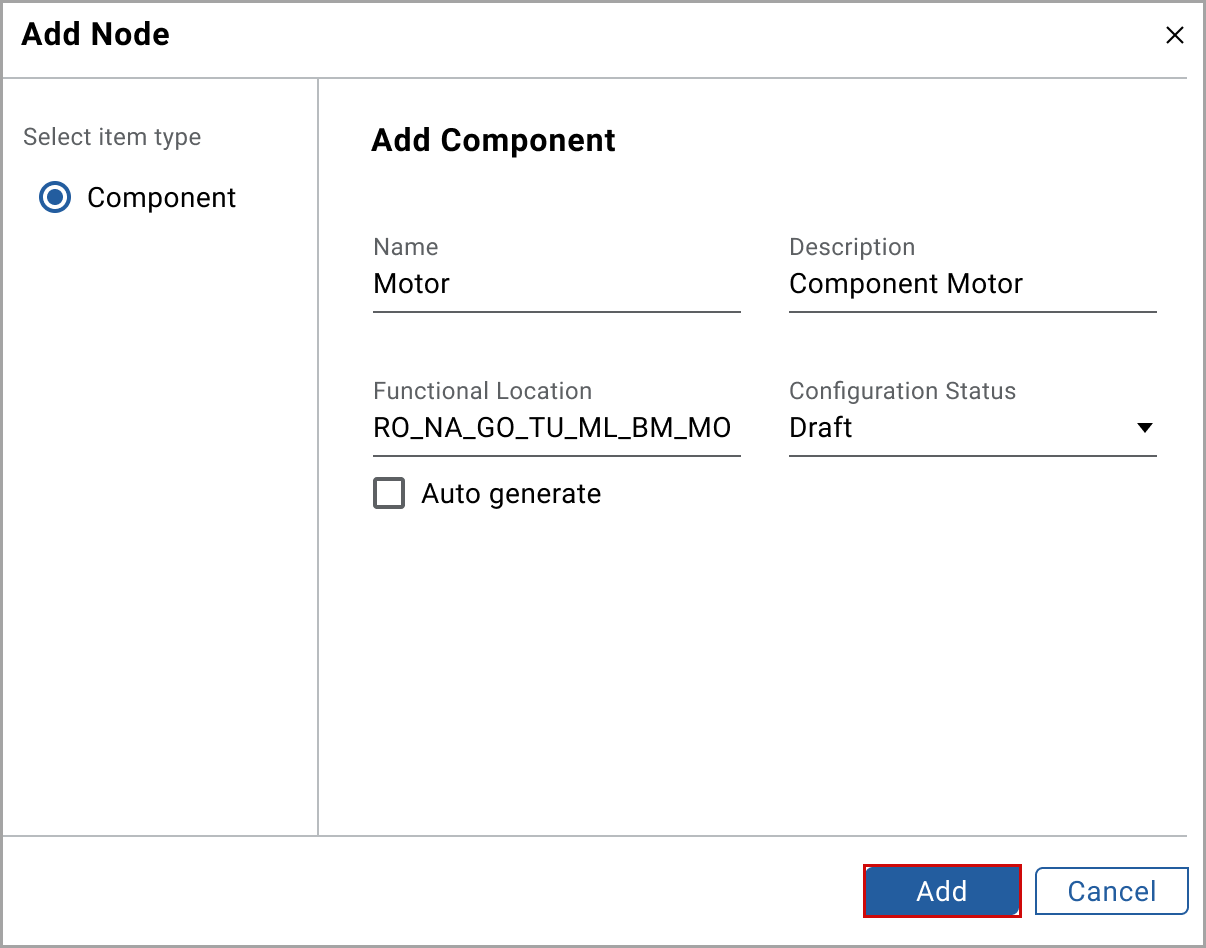
 - In theAdd Nodewindow, set these parameters:
- Name: Provide the component name.
- Description: Provide the description of the component.
- Functional Location: Provide the location details.NOTE: Select theAuto generatecheck box to use the system-generated functional location.
- Configuration Status: Select the status from the drop-down list.
- Click [Add].Add Component
 The "Component was added under the asset successfully" message displays.
 - (Optional) In theInfotab, click [Edit] and perform the following actions:
- Geographical Location: Provide the geographical location.
- Contact Details: Provide the contact details.
- Remarks: Provide the remarks.
- Make: Provide the asset make details.
- Commission Date: Select the commission date using the date picker.
- Lifecycle Status: Select the lifecycle status from the drop-down list.
- Files Uploaded: Click [Browse] to upload the files related to the asset.
- Click [Save].
To configure
KPI
, Sensors
, and Advisory
tab, see Configure KPI, Configure Sensors, and Configure Advisory.Provide Feedback