Standard Mode
IMPORTANT:
Before starting the installation, ensure that the system is clean (even uninstall JAVA, if it was installed).
The Standard Mode installs all components to the same machine. Perform the following steps to install the DataView application:
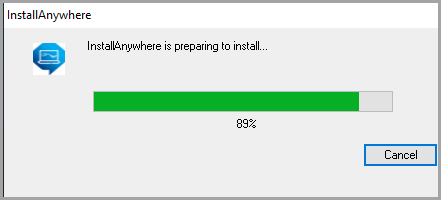
- Right-click theFactoryTalkAnalytics_DataView_Installer_Windows-<version>.<build>.exefile and select [Run as administrator] to begin the installation.Preparing To Install
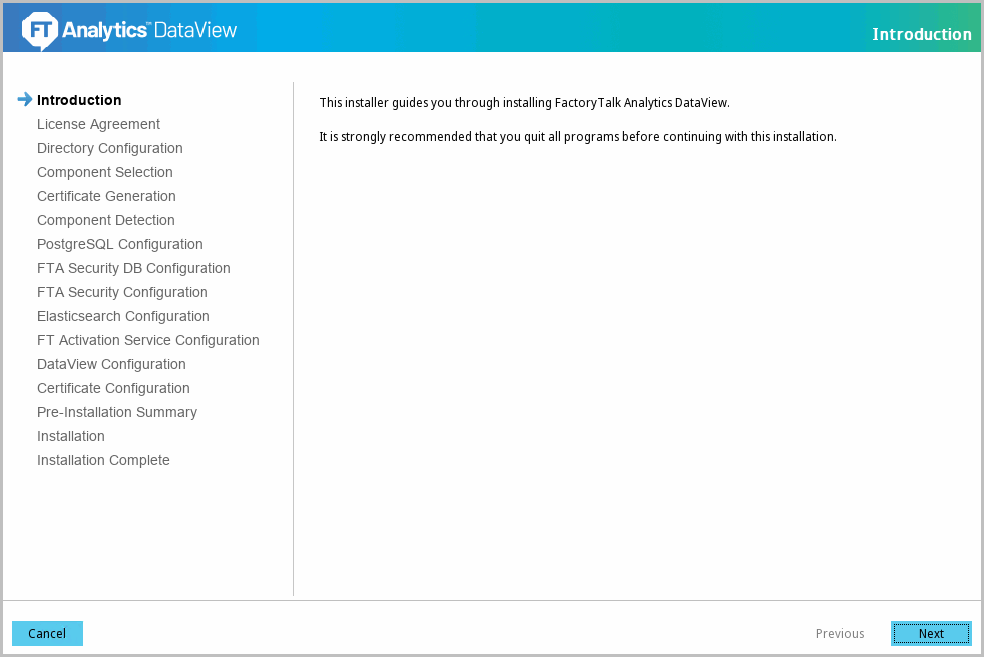
- The Introduction screen displays. Click [Next].Introduction Screen
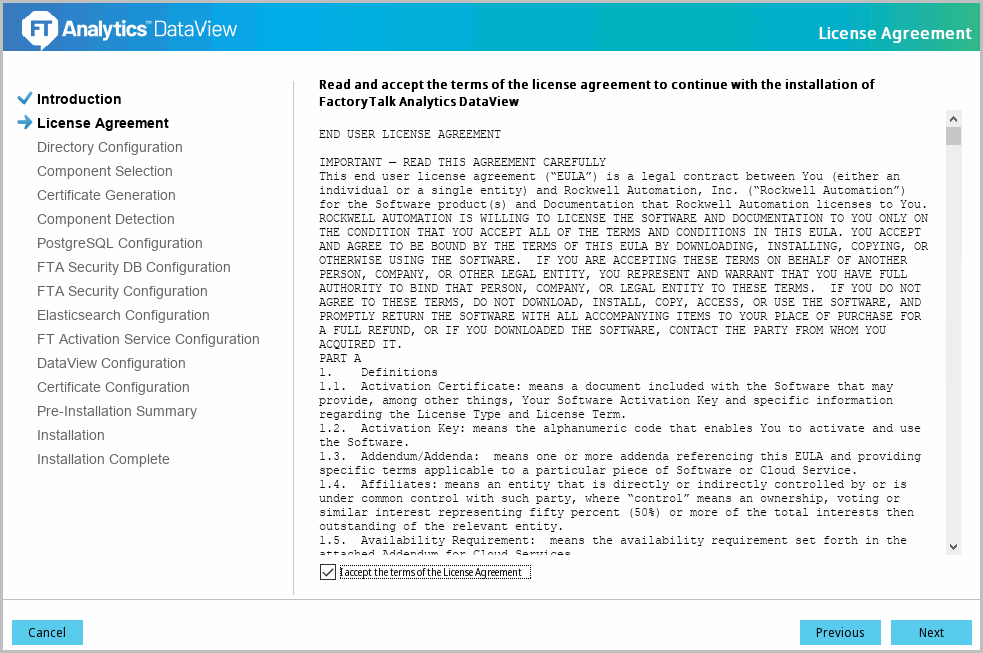
- After the wizard initializes the setup, the 'License Agreement' screen displays. Scroll down, accept the license agreement, and then click [Next].License Agreement
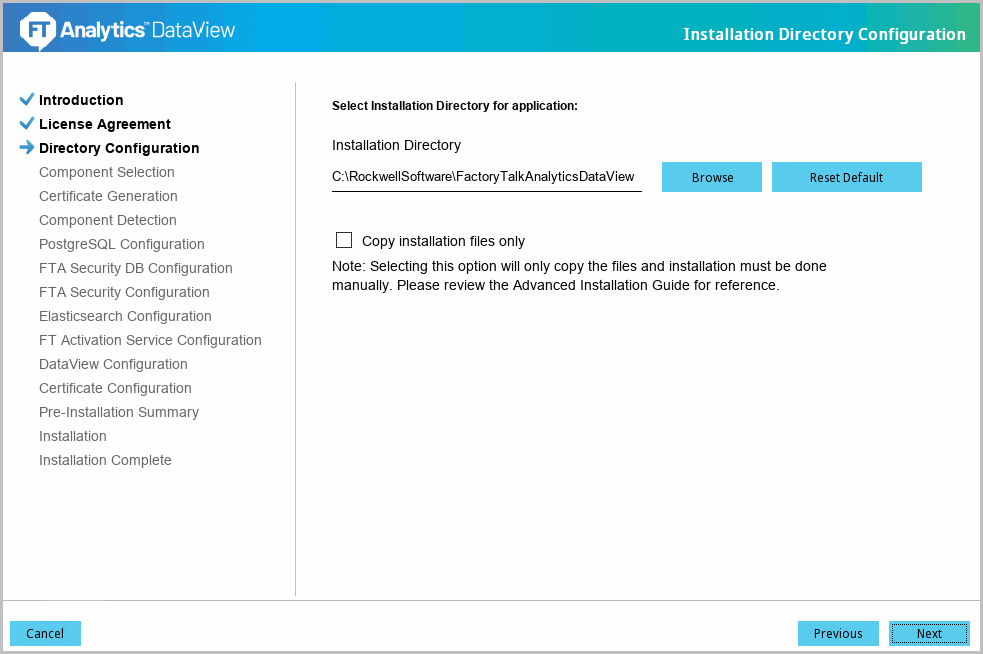
- The 'Installation Directory Configuration' screen displays. Specify the file location where the DataView files to be extracted and click [Next]. The default directory is:C:\RockwellSoftware\FactoryTalkAnalyticsDataViewInstallation Directory Configuration
 The 'Component Selection' screen displays.
 - Ensure that all the components are selected and click [Next].Component Selection
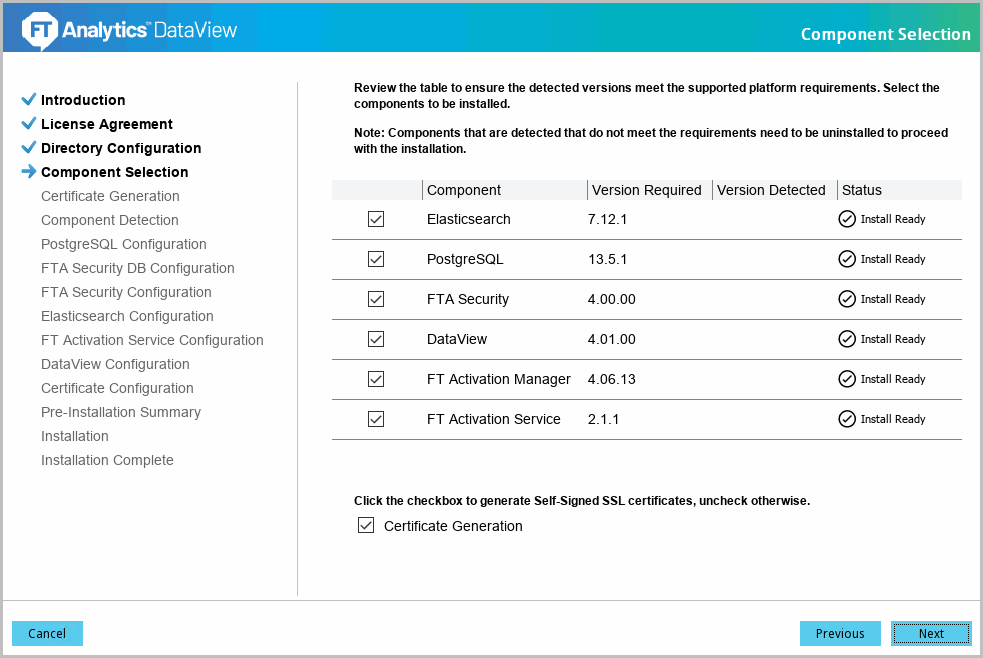 NOTE:The following status will be displayed based on the version of FTActivation installed for DataView:
- If lower version of FTActivation is already installed, the “Not Supported” Status will be displayed. User needs to manually uninstall the lower version of FTActivation and then run the DataView installer.
- If same version (4.06.13) version of FTActivation is already installed, the “Installed” Status will be displayed.
- If Higher version of FTActivation is already installed, the “Supported” Status will be displayed.
- The 'Certificate Generation' screen displays.
- If User have self-signed certificates, select the [Generate Keystore files] option and provide the file paths along with the password and click [Validate].
Generate Keystore files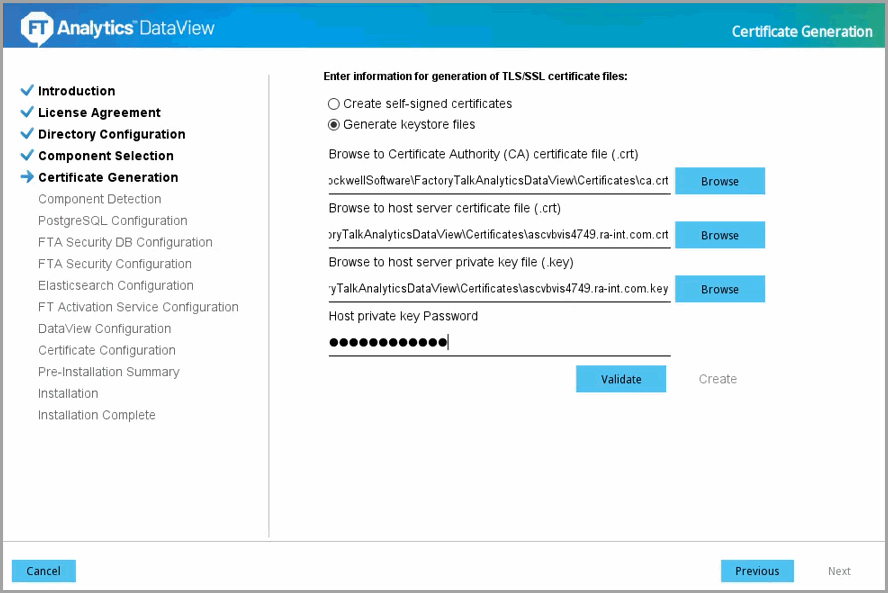
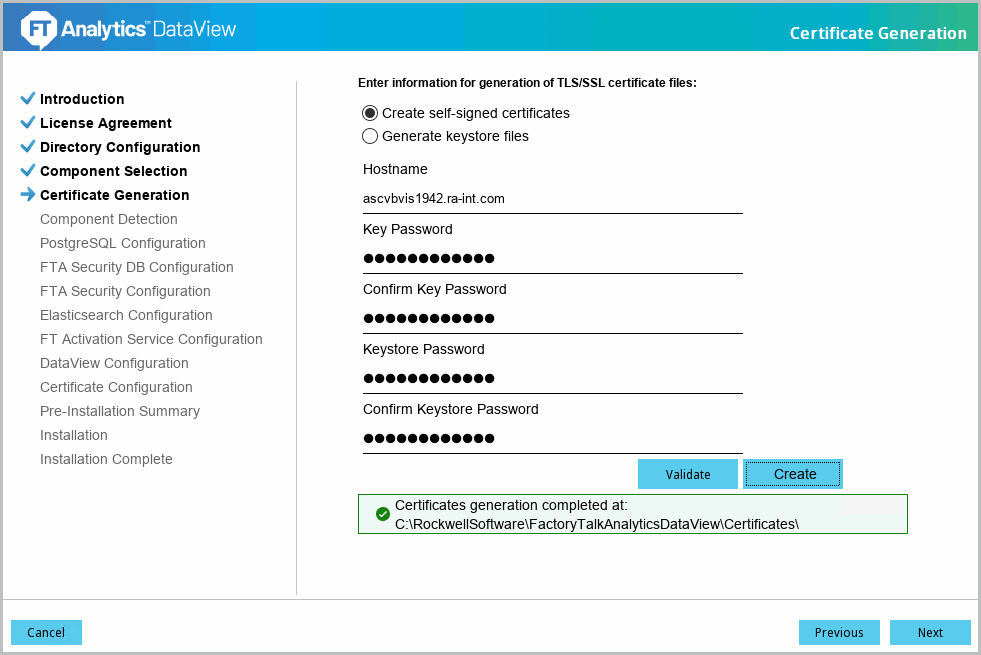
- If the User does not have self-signed certificates and needs to create self-signed certificates using the installer, select the [Create self-signed certificates] option and define the following fields:
- Hostname: By default, the hostname (FQDN) of the machine is available.
- Key Password: Provide the password for Certificates Key.
- Confirm Key Password: Re-enter the password.
- Keystore Password: Provide the password for Certificates Keystore.
- Confirm Keystore Password: Re-enter the password.
The following table contains a list of thesupportedspecial characters that can be used to create a password:Supported Special Characters~{}[]!@-_$*+/?:.NOTE:Combinations of 3 supported special characters in a consecutive pattern may cause unexpected results. For example: ${}The following table contains a list of the special characters that arenot supportedto create a password:Unsupported Special Characters\"&<>|'`%=;^blank#(),Certificate Generation- Create self-signed certificate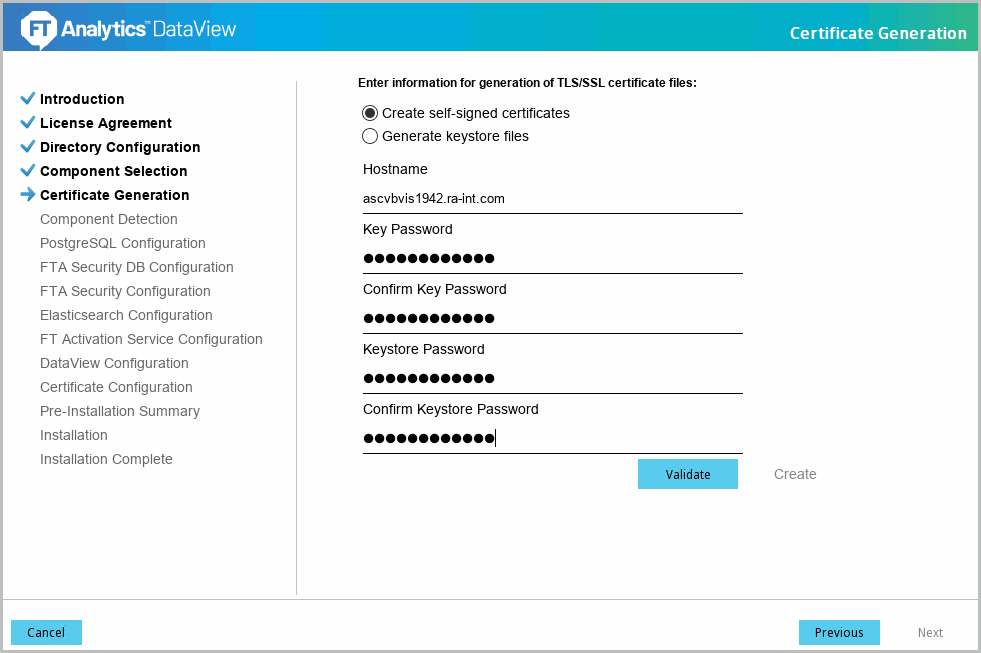
- Click [Validate] to verify the provided details. The “Validation successful” message displays if the details are valid.Certificate Generation - Validate Passwords
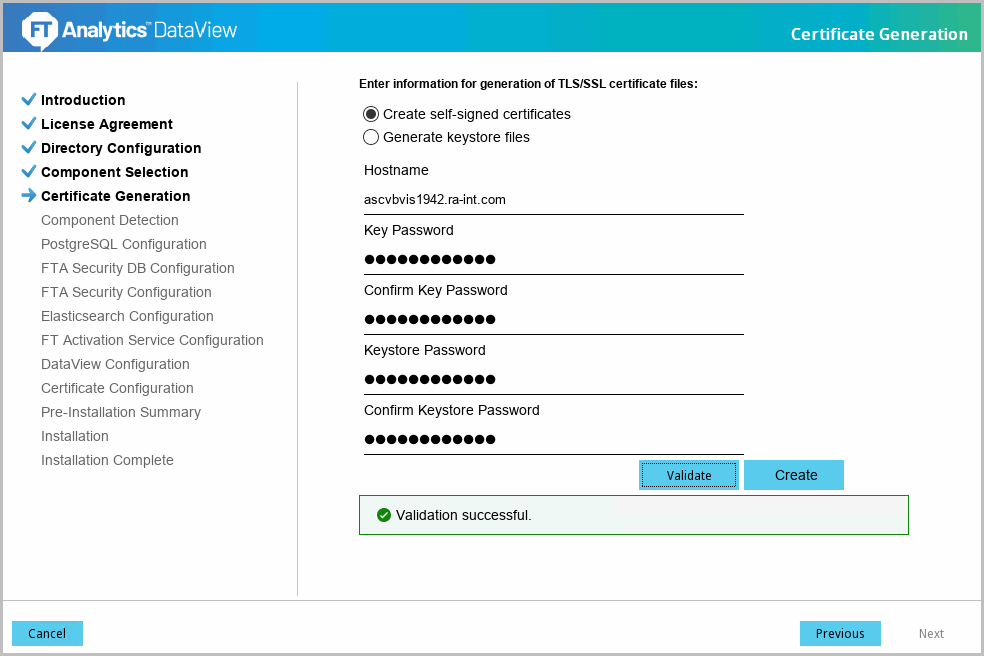
- Click [Create] to generate the certificates. The ‘Certificates generation completed’ message with the certificates directory displays, click [Next]Certificate Generation
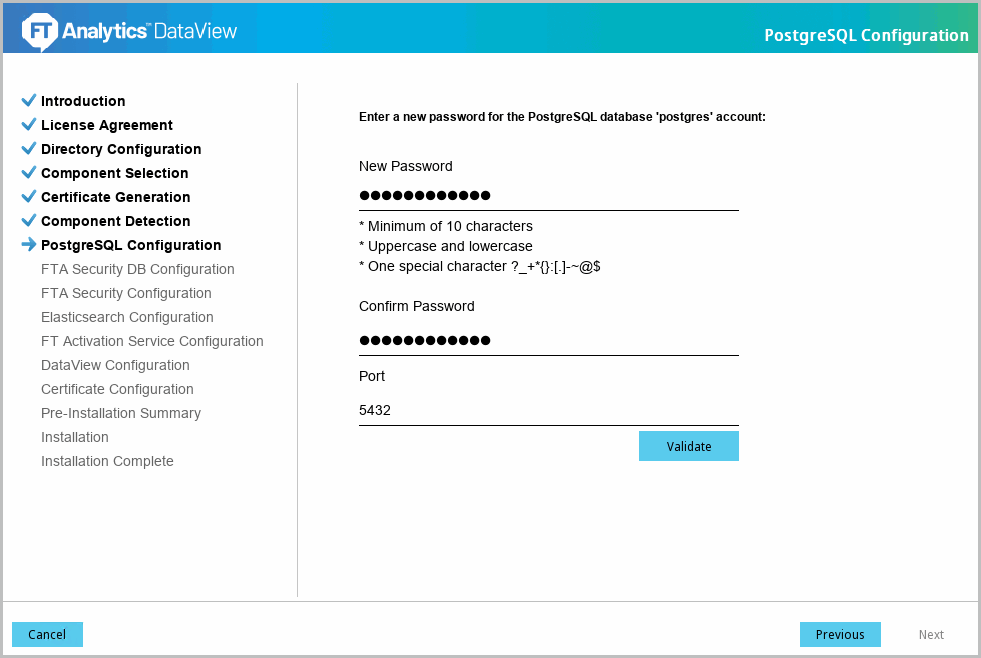
- The 'PostgreSQL Configuration' screen displays. Define the following fields:
- New Password: Provide the password.
- Confirm Password: Re-enter the password.
- Port: Default port number is 5432. It is recommended to keep the default port number.NOTE:Refer to Standard Mode for the list of the supported special characters that can be used to create a password. Write down this password, it is required to access PostgreSQL later.PostgreSQL Configuration
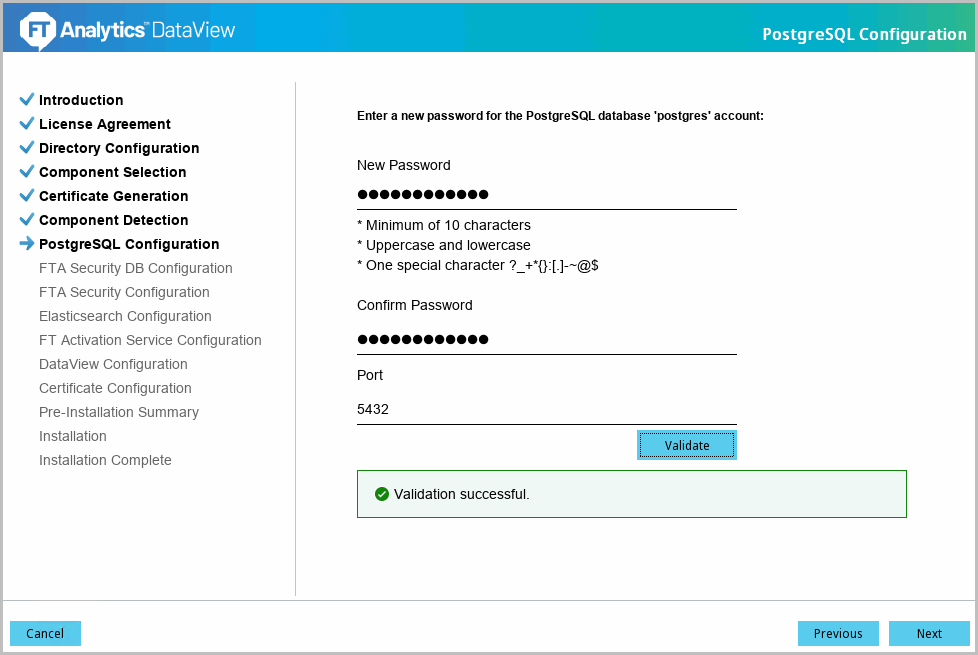
- Click [Validate] to verify the provided details. The ‘Validation successful’ message displays if the details are valid. Click [Next] to continue.Verify PostgreSQL Configuration
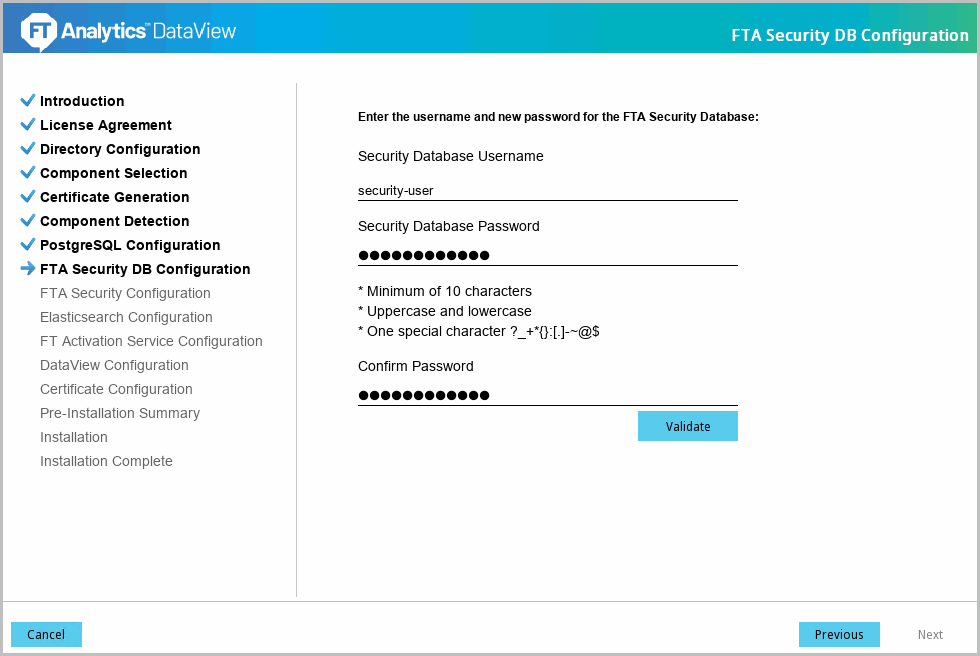
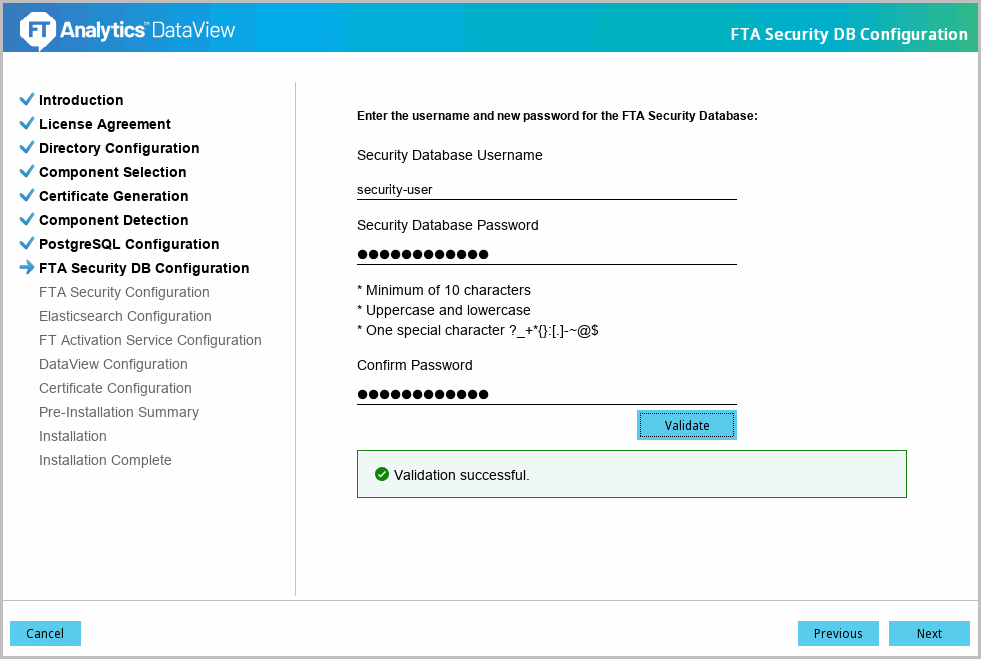
- The 'FTA Security DB Configuration' screen displays. Define the following fields:
- Security Database Username: Provide the username
- Security Database Password: Provide the password
- Confirm Password: Re-enter the passwordNOTE:Refer to Standard Mode for the list of the supported special characters that can be used to create a password. Write down this password, it is required to access PostgreSQL later.FTA Security DB Configuration
- Click [Validate] to verify the provided details. The ‘Validation successful’ message displays if the details are valid. Click [Next] to continue.Verify FTA Security DB Configuration
- The 'FTA Security Configuration' screen displays. Define the following fields:IMPORTANT:It is recommended to use HTTPS to encrypt the network traffic. Using HTTP will expose the user/password and sensitive information as clear text on the network.
- Username: Provide the username
- New Password: Provide the passwordNOTE:Refer to PostgreSQL for the list of the supported special characters that can be used to create a password. Write down this password, it is required to access FTA Security later.
- Confirm Password: Re-enter the password
- Port: Default port number for HTTPS is 9043. The user can change the port number. It is recommended to use the default port number.
FTA Security Configuration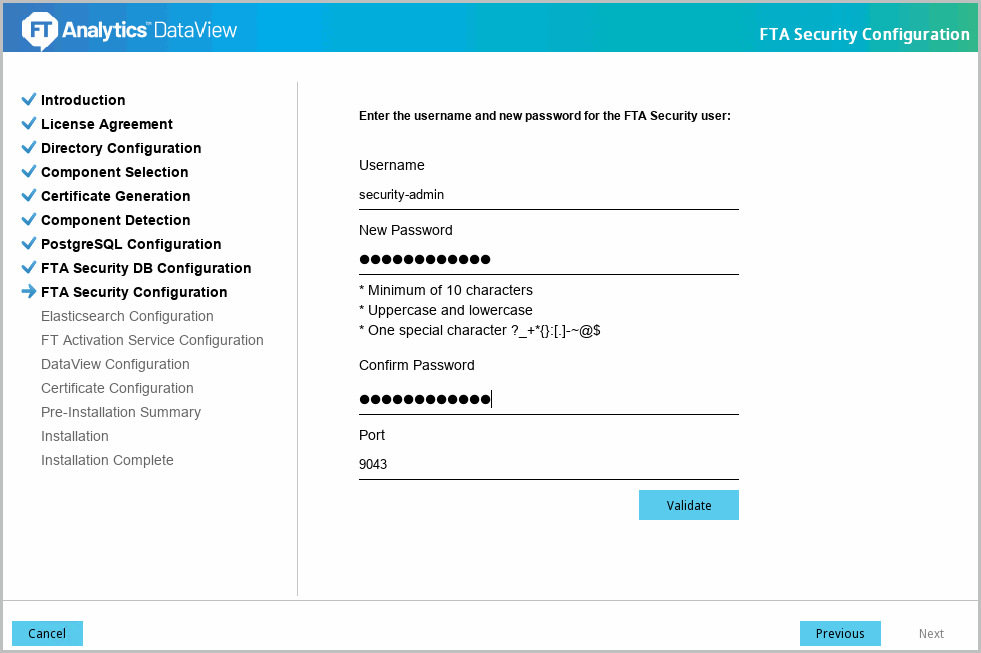
- Click [Validate] to verify the provided details. The “Validation successful” message displays if the details are valid. Click [Next] to continue.Verify FTA Security Configuration

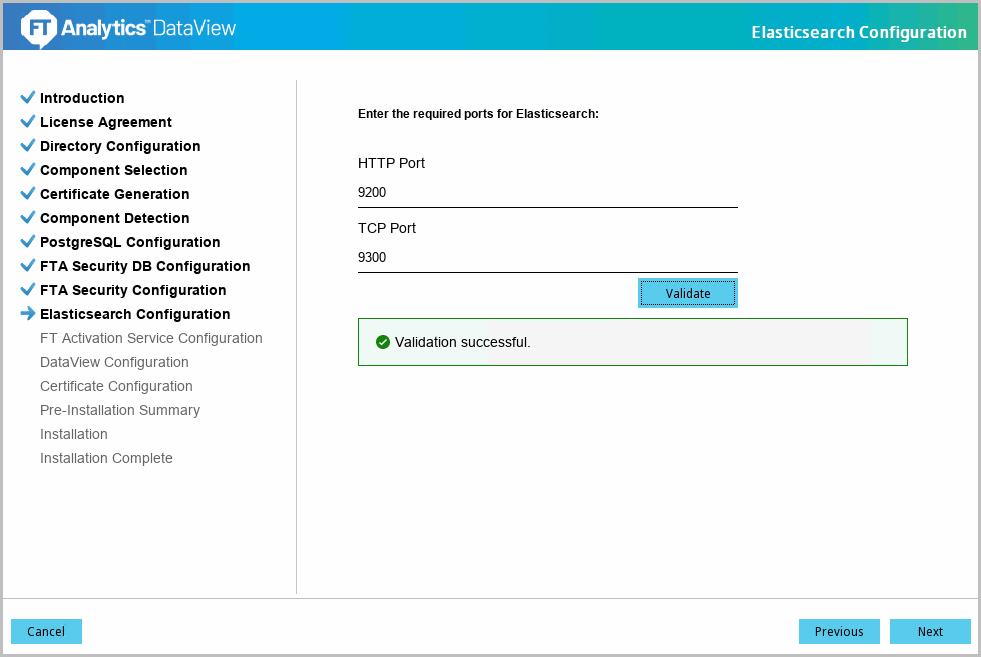
- The 'Elasticsearch Configuration' screen displays. Define the following fields:
- HTTP Port: Default port number is 9200. It is recommended to use the default port number.
- TCP Port: Default port number is 9300. It is recommended to use the default port number.Elasticsearch Configuration
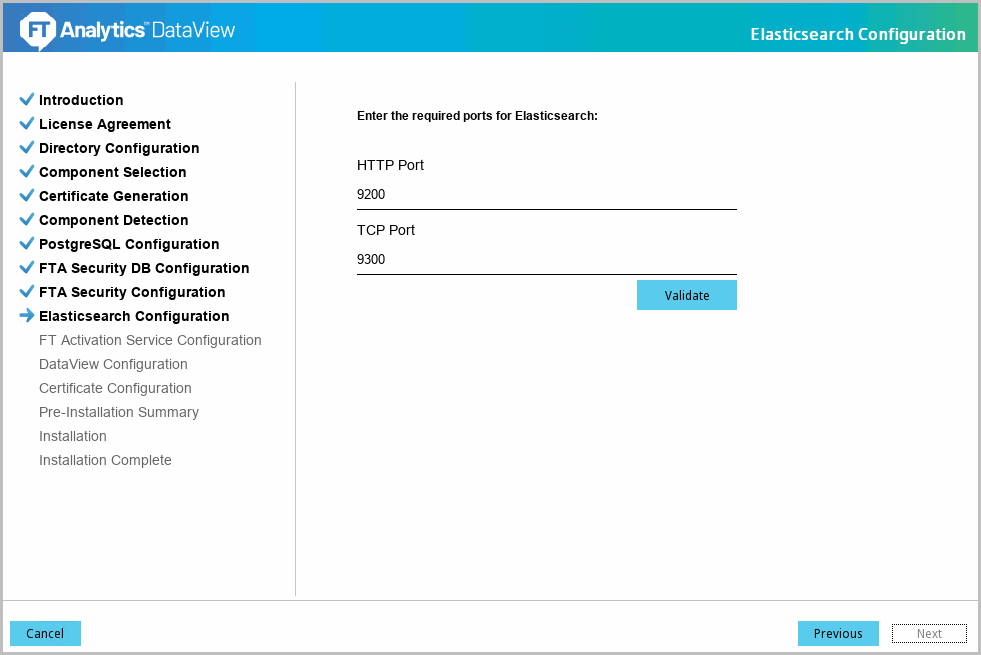
- Click [Validate] to verify the provided details. The ‘Validation successful’ message displays if the details are valid. Click [Next] to continue.Elasticsearch Configuration
 NOTE:Even if a higher version of FT Activation Manager is already installed, the user can install DataView using the installer. But the lower version of FT Activation Manager is not supported.
 - The ‘FT Activation Service Configuration’ screen displays. By default, the following FT Activation Service details are provided. Ensure that these values are valid.IMPORTANT:Ensure that proper permissions are provided to access certificates folder.
- Certificate File: Provide the certificate path, where the certificate is generated.
- Certificate Password: Provide the password for the certificate.
- Certificate Key Password: Provide the password for the Certificate Key.
- Service Port: Default port number for HTTPS is 27100. It is recommended to use the default port number.FT Activation Service Configuration
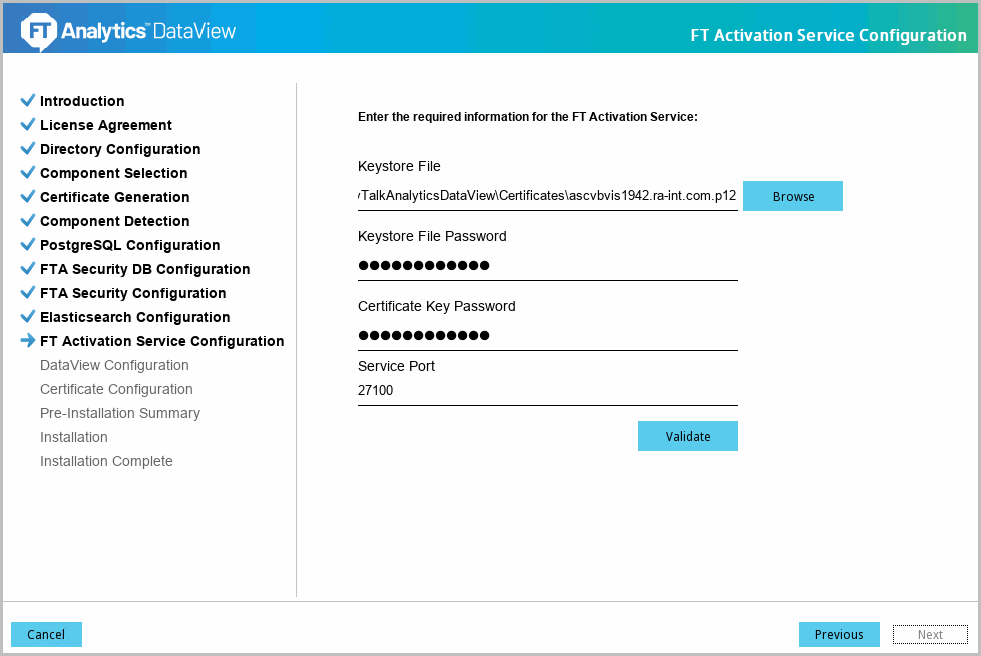
- Click [Validate] to verify the provided details. The ‘Validation successful’ message displays if the details are valid. Click [Next] to continue.Verify FT Activation Service Configuration
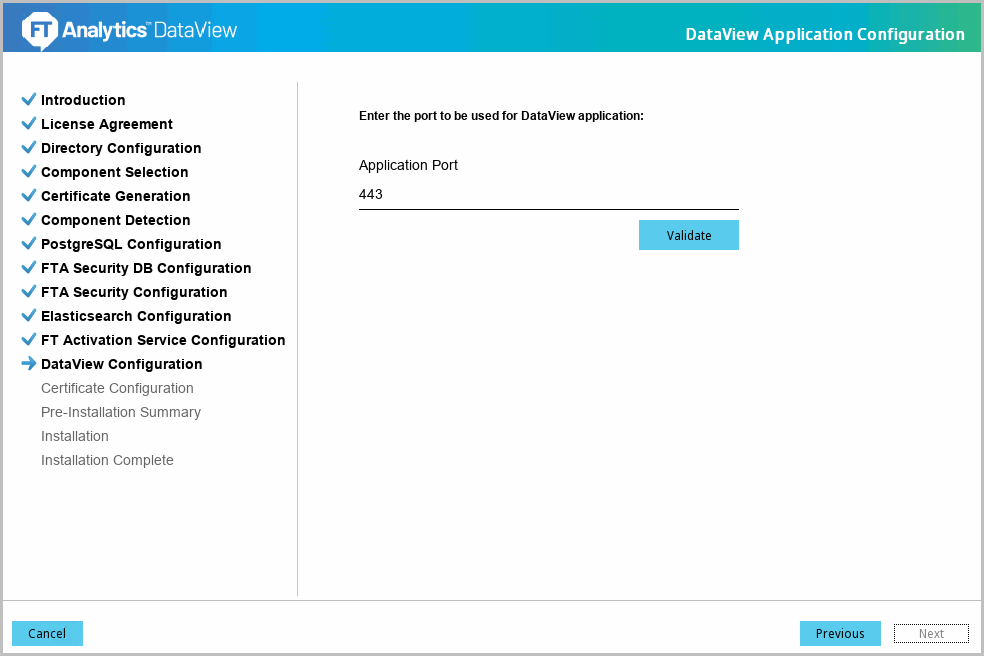
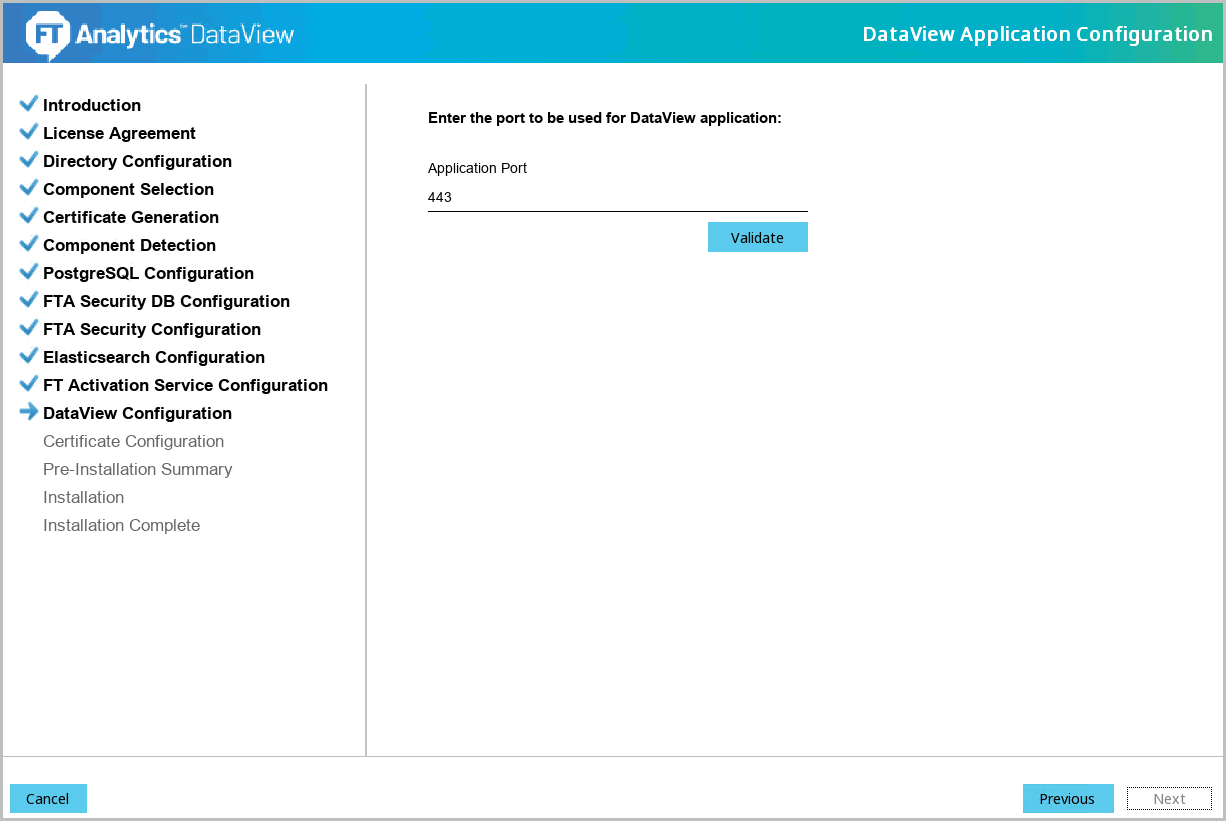
- The 'DataView Application Configuration' screen displays. Define the following field:
- Application Port: Default port number for HTTPS is 443. It is recommended to use the default port number.DataView Application Configuration
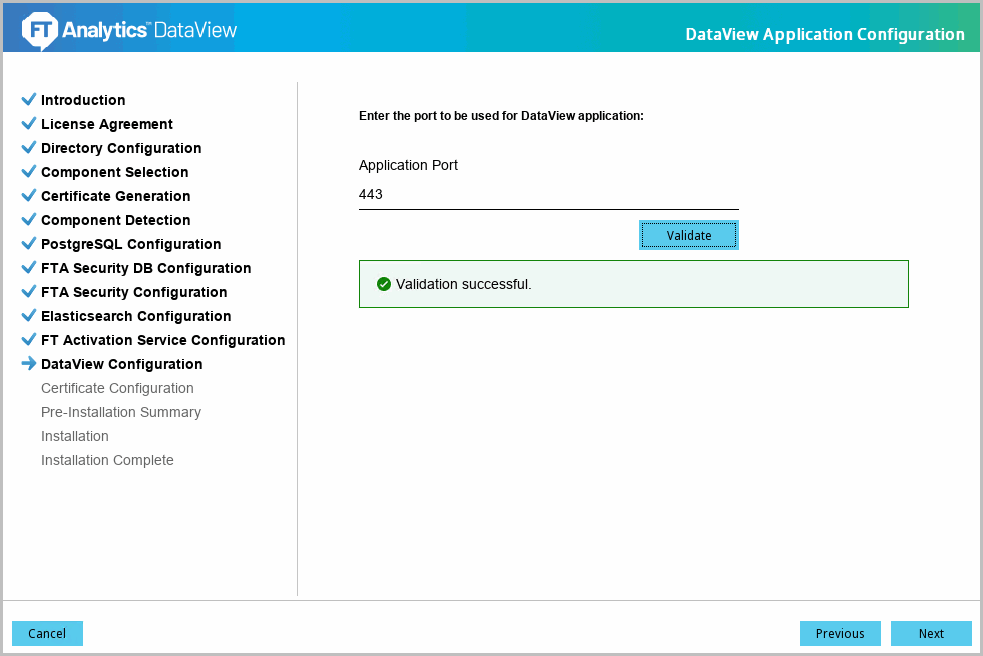
- Click [Validate] to verify the provided details. The ‘Validation successful’ message displays if the details are valid. Click [Next] to continue.Verify DataView Application Configuration
- The Installer will skip the Certificate Configuration section if user click generates certificates option while installation.
- If the User have their own certificates, the Certificate Configuration screen displays.
Certificate Configuration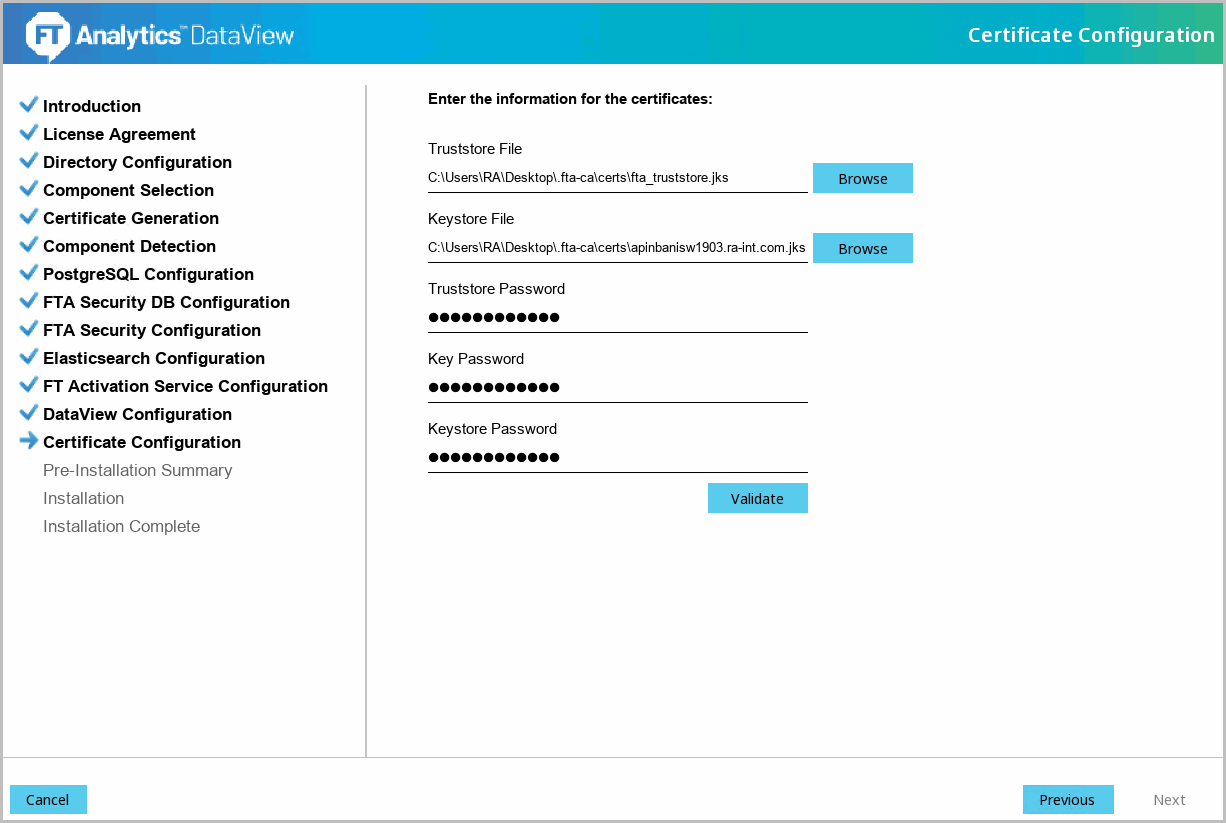
- Click [Validate] to verify the provided details. The 'Validation successful' message displays if the details are valid. Click [Next] to continue.
Certificate Configuration
- The 'Pre-Installation Summary' screen displays. Verify the following:
- Product Name
- Install Folder
- Disk Space Information
- Install Component(s):
- Component Name
- Component Version Numbers
- Component Port NumbersTIP:It is recommended to have minimum 16 GB of Memory and 300 GB of Hard Disk space to perform a normal installation.Pre-Installation Summary

- Click [Install] to begin the installation. The installation progress screen displays.IMPORTANT:The installer may take about 30 to 40 minutes to install depending on the system configuration.
- The 'Install Complete' screen displays. Hereafter theC:\RockwellSoftware\FactoryTalkAnalyticsDataViewfolder is called as<DataView_HOME>in this document.
- Click [Done] to close the installer.NOTE:If any warnings or errors display, check the installation logs before exiting the installer.Install Complete
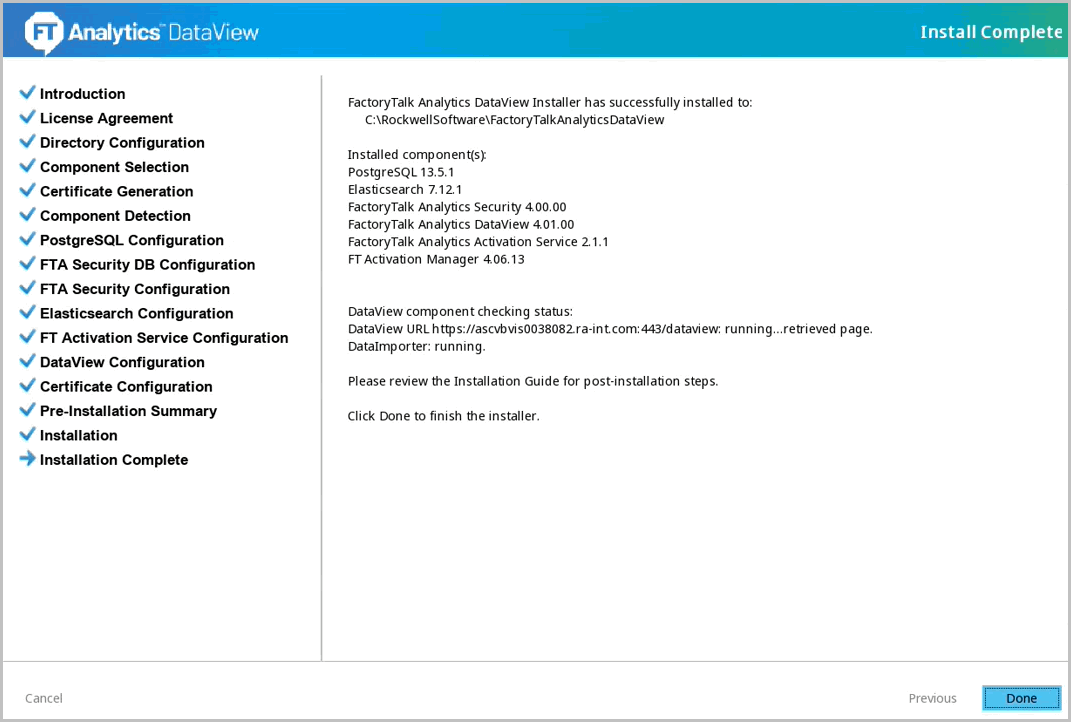 NOTE:By default, the required ports are opened by the installer. For example: 443, 9043, 9200, 9300, 5432 and 27100.
 - Skip to "Post Installation" chapter to continue the installation.NOTE:The folders created during the installation of the product contain critical data. The system administrator must ensure that the proper permissions are set to these installation directories. Only the authorized user may have access to the data. It is the responsibility of system administrator who is extracting the files to keep them secure. This is to ensure that the sensitive and critical information is not shared between the users.
Provide Feedback